Platform role guides — what each role can do, step by step
How the Tarleaks platform owner runs the console: the staff roles and what each allows, the requests that need a second person, the refund limit, the website's clicks, bank transfers waiting, and who looks after each company. 20 steps across 1 roles, every one of them carried out in the product before it was published here.
Last updated
Nothing matches that. Try a shorter word, or pick All roles to search every guide.
Platform owner
Run the platform from one console, and let your staff do their part without giving away the keys.
Runs the platform: the companies, billing, the staff and their roles, and the requests that need a second person's yes.
What you will be able to do
- See what each staff role allows before you give it to someone
- Decide the requests that need a second person, and read every past decision
- Set how much a staff member may credit or refund alone
- See which website buttons bring free trials
- Record bank transfers once the money is in the bank
- Choose who looks after each company, and see when it opened support access
- Choose which countries may open the public website and start a free workspace
- See every failed request, grouped, and where each one stands
- Set the storage plans, their prices, and the AI workspaces start with
- Approve or refuse a company's request to move to its own server
- See how the phone app is used, counting only people who agreed
What this role can and cannot do
| Can | Cannot |
|---|---|
|
|
20 steps, each one carried out in the product on .
Staff roles and what each allows #
Where Platform » Staff » Roles
- Open Platform, then Staff.
- Choose the Roles tab.
- Click a role on the left, for example Account manager.
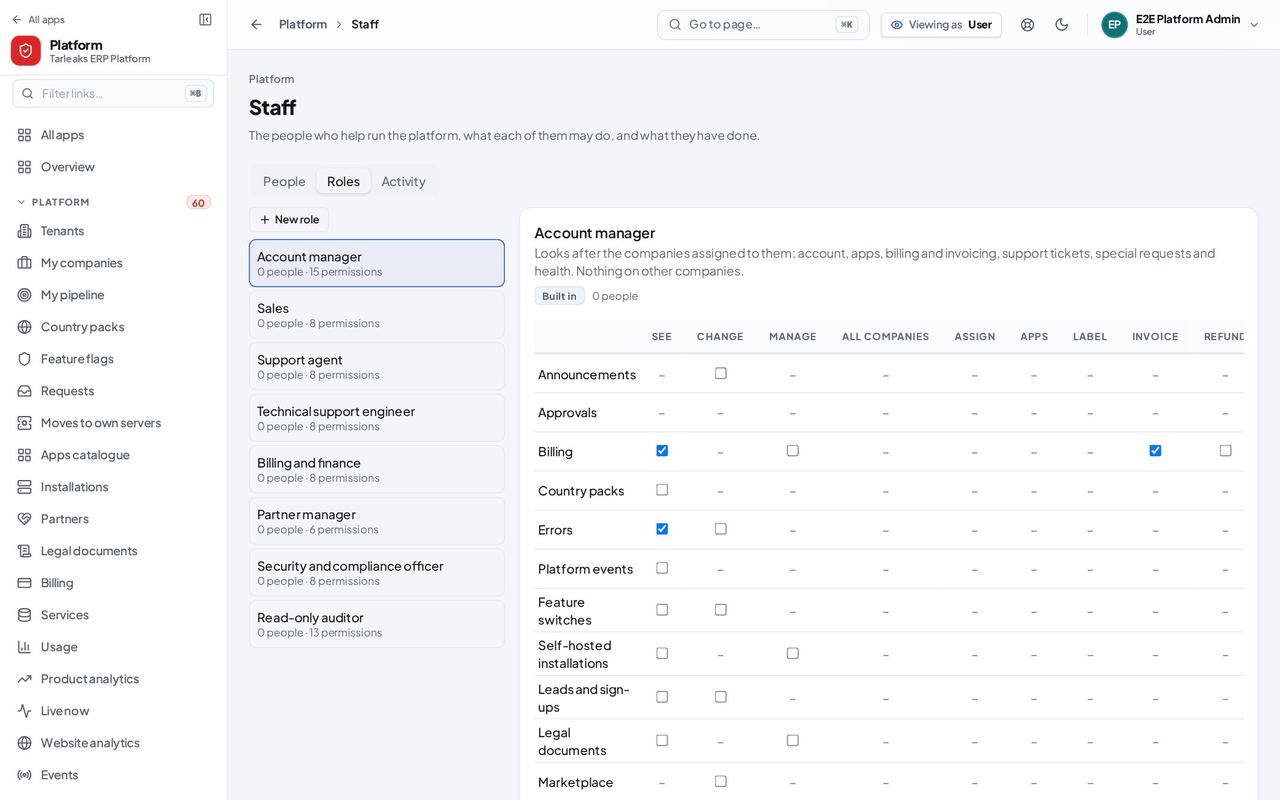
You should see The roles down the left, each with how many people hold it. On the right, the chosen role: who it is for, a grid of what it may read and change, and What this role allows in words.
Worth knowing Only you change what a role includes. Everyone with the role gets the change on their next request.
The four-eyes money limit #
Where Platform » Services » Settings » Staff
- Open tarleaks.com (the main address, not a company's) and choose Sign in.
- Type your e-mail and password. Leave Company empty if it is shown: empty means the platform.
- Type the 6-digit code from your authenticator app.
- In the Platform menu, choose Services. The Settings tab opens.
- Scroll down to the Staff card.
| Field | What to put in it |
|---|---|
| AED, USD, ... | The most a staff member may credit or refund on one invoice without a second person. 1,000 AED and 275 USD by default. |
| Add a currency | Type a three-letter code to set a limit for another currency. |
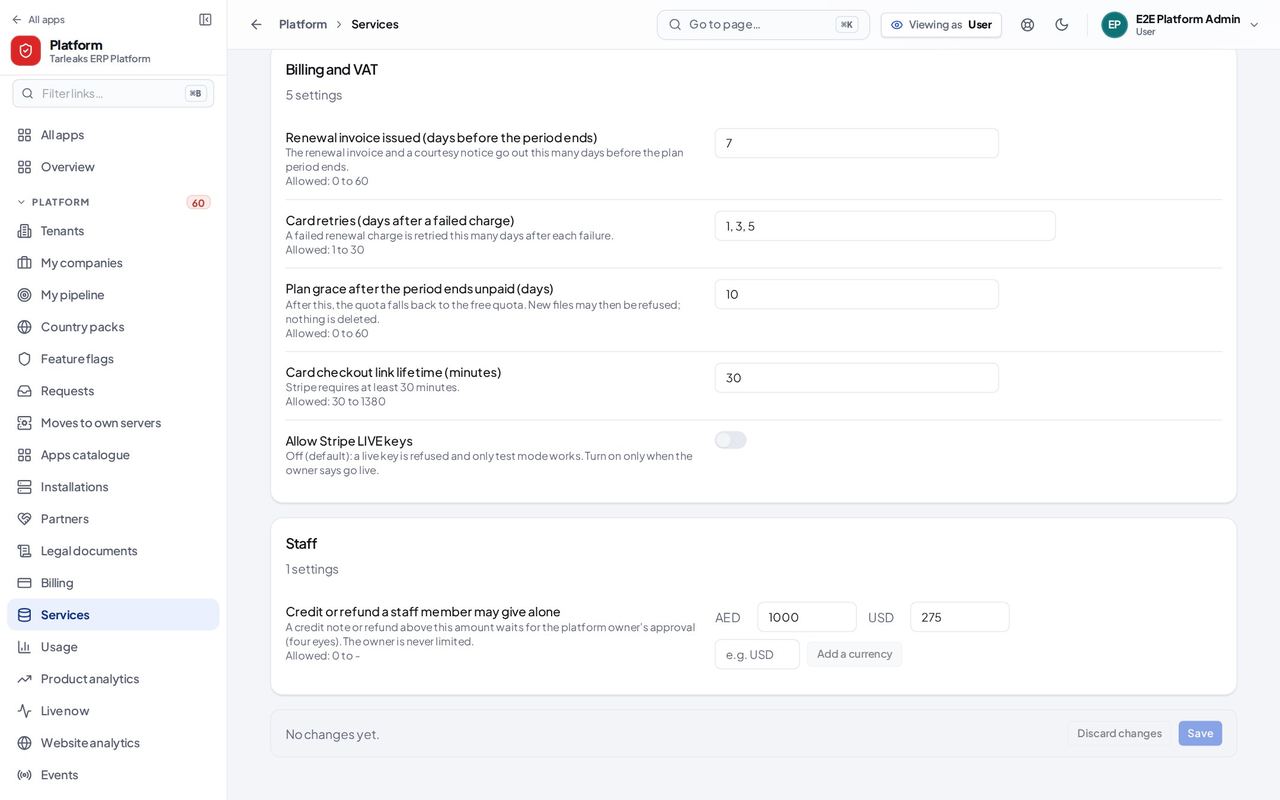
You should see Credit or refund a staff member may give alone, with one amount per currency and a line saying what happens above it.
Watch out Only an amount strictly above the limit waits, and what was already credited or refunded on the same invoice counts towards it. 0 means every amount waits, and a currency with no amount always waits. You are never limited. A change waits in the bar at the bottom until you press Save, and reaches every server within half a minute.
Which buttons bring free trials #
Where Platform » Website analytics » Clicks
- Open Platform, then Website analytics.
- Choose Clicks.
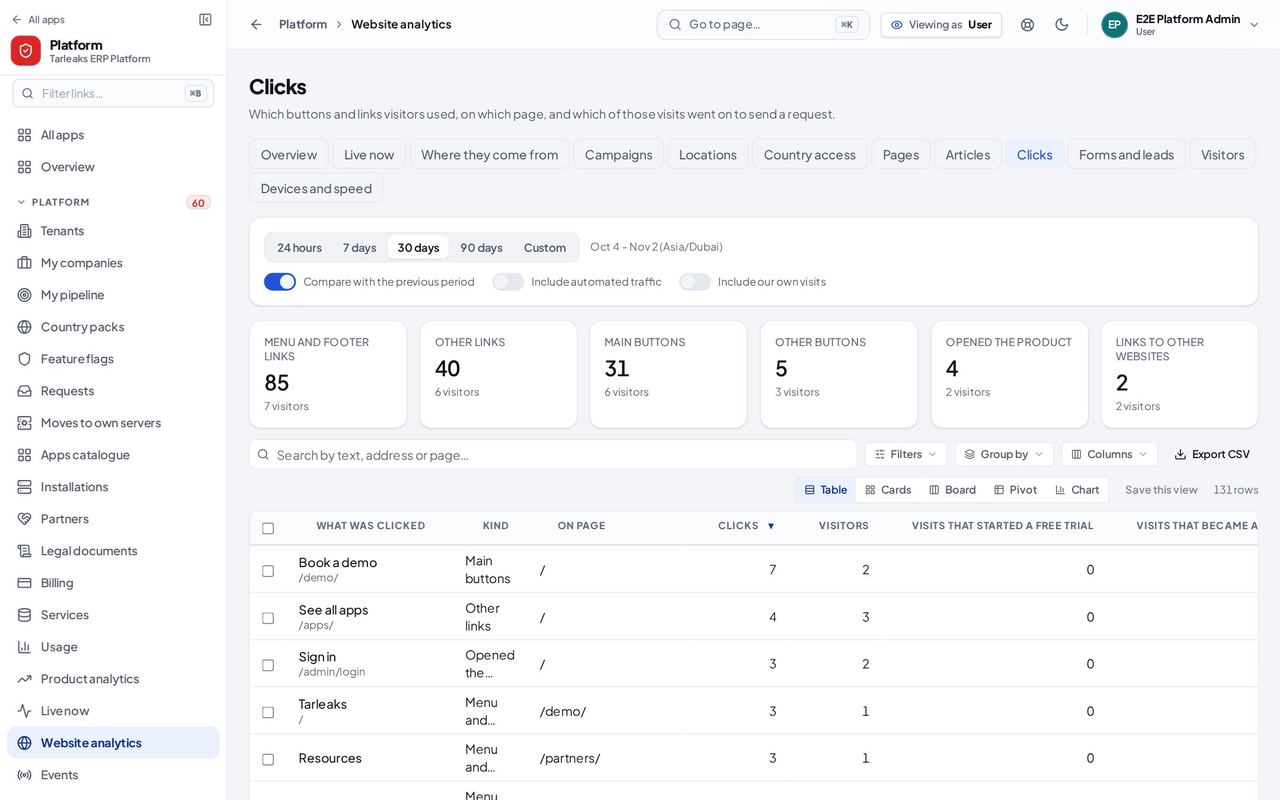
You should see One tile per kind of click, then every button and link: what was clicked, on which page, how often, by how many visitors, and how many of those visits went on to start a free trial.
Worth knowing Sort by Visits that started a free trial to see which button earns its place.
Bank transfers waiting #
Where Platform » Billing » Bank transfers waiting
- Open Platform, then Billing.
- Press the Bank transfers waiting tile.
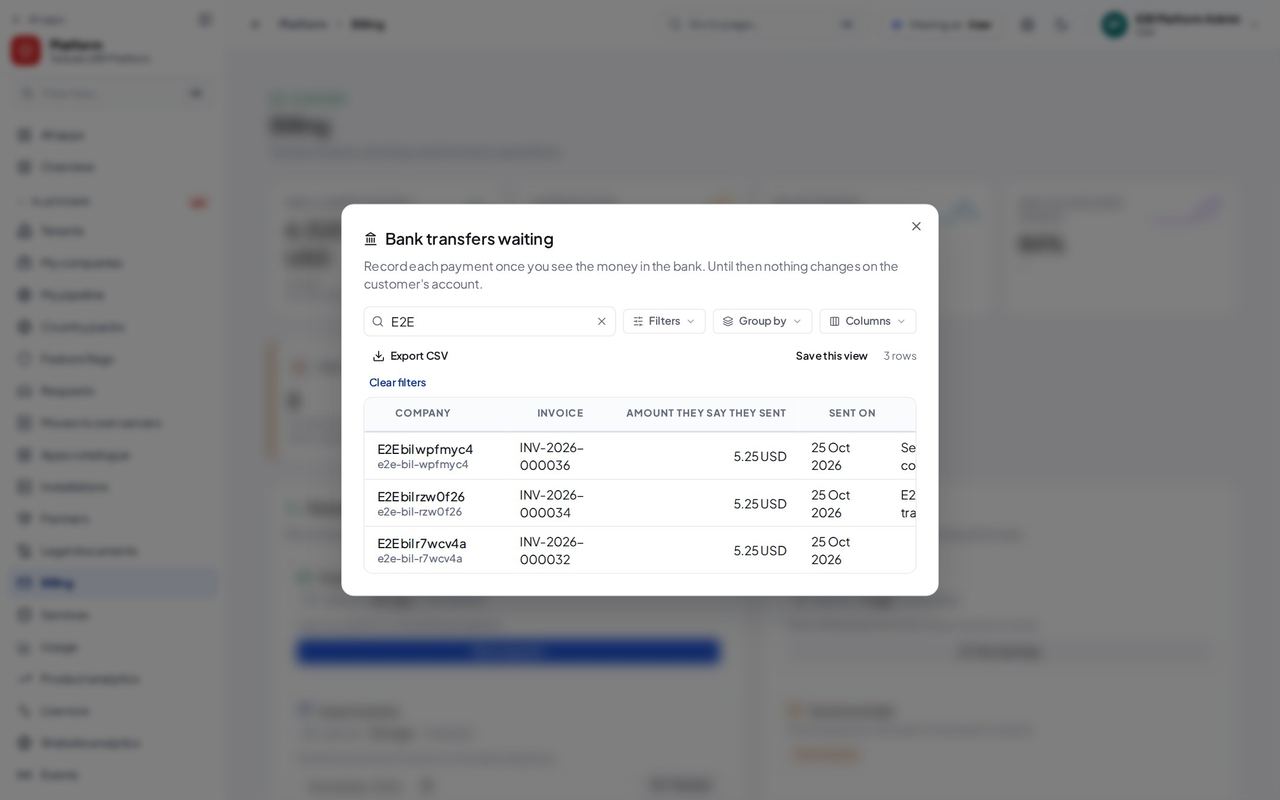
You should see Each company that says it has paid by bank transfer: the invoice, the amount they say they sent, the date and their note, with Record payment on each row.
Worth knowing Their word is not the money: record a payment only once it is on your bank statement.
A company's account team and support access #
Where Platform » Tenants » a company » Account team
- Open Platform, then Tenants.
- Click the company's name.
- Choose the Account team tab.
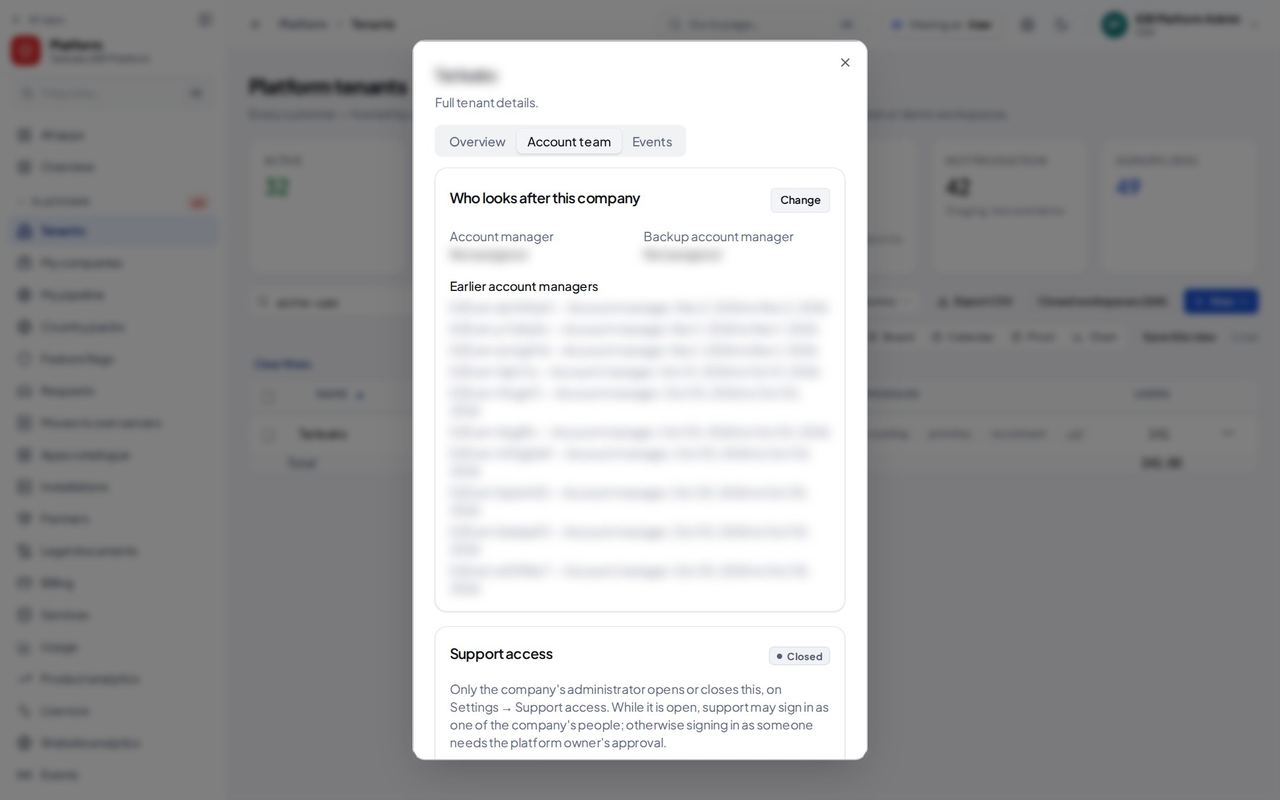
You should see Who looks after this company: the account manager and the backup, and who did before. Below, whether the company has opened support access, until when, and every earlier opening.
Worth knowing Only the company's administrator opens or closes support access. While it is closed, signing in as one of its people needs your approval.
Which countries may open the website #
Where Platform » Website analytics » Country access
- Open Platform, then Website analytics.
- Choose Country access.
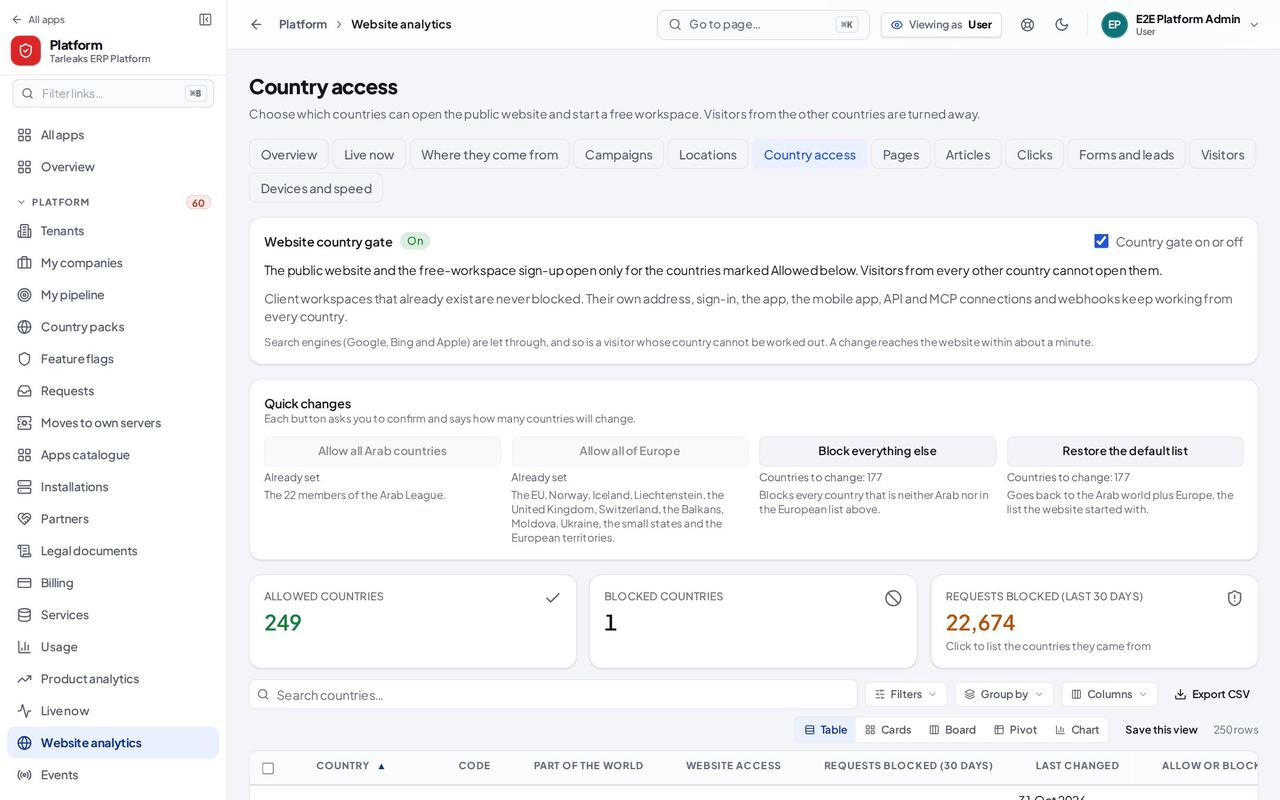
You should see The Website country gate card says whether the gate is on. Below it, the countries: which are allowed, which are blocked, and how many requests were turned away in the last 30 days.
Worth knowing The gate closes the public website, the free-workspace sign-up and sign-in to existing companies from a country that is not allowed. Platform super-administrators are never refused, and workspace addresses, token connections and webhooks are not affected.
Failed requests, grouped, with where each one stands #
Where Platform » Errors
- Open Platform, then Errors.
- Press a tile, for example New or Came back, to list only those groups.
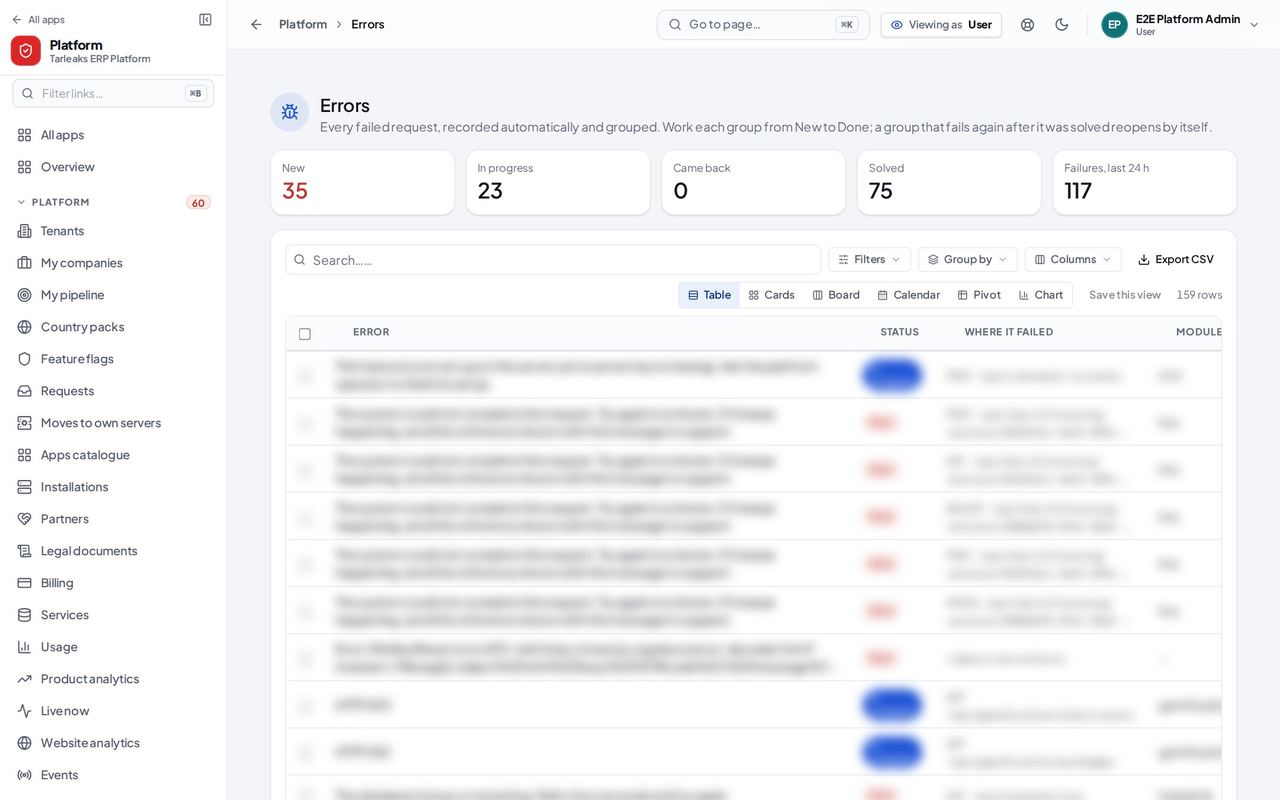
You should see The tiles count the groups by where they stand: New, In progress, Came back and Solved, and the failures of the last 24 hours. Below, one row per group of identical failures.
Worth knowing A group that fails again after it was marked Solved comes back as Came back, so a fix that did not hold is never lost.
Storage plans and prices #
Where Platform » Services » Plans & prices
- Open Platform, then Services.
- Choose the Plans & prices tab.
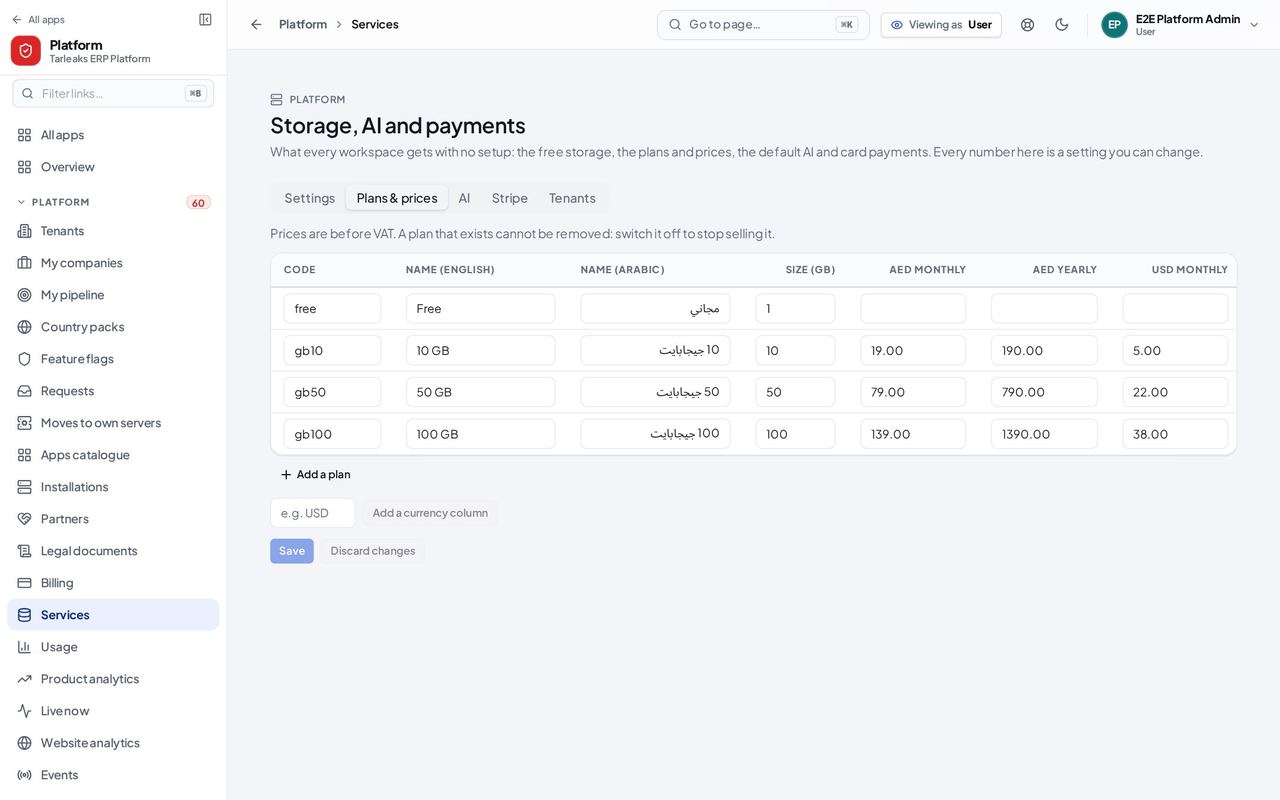
You should see One row per storage plan: its code, its names in English and Arabic, its size in GB, the monthly and yearly price in each currency, and whether it is on sale.
Worth knowing Prices are before VAT. A plan that exists cannot be removed: switch it off to stop selling it. New prices apply to the next purchase; companies keep what they bought.
The AI every workspace starts with #
Where Platform » Services » AI
- Open Platform, then Services.
- Choose the AI tab.
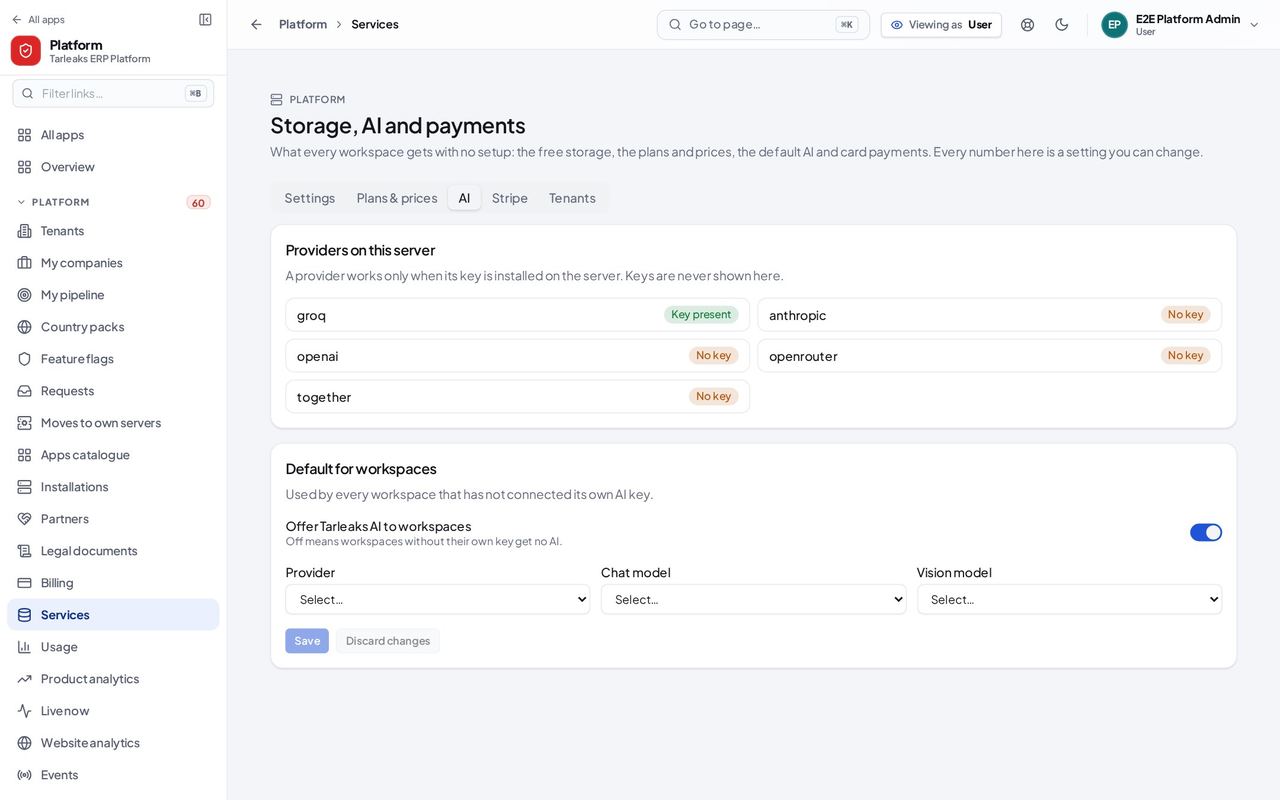
You should see Providers on this server, each marked Key present or No key, and below them the default provider, chat model and vision model for workspaces that have not connected their own key.
Worth knowing Keys are never shown here. A provider without a key would give workspaces no AI, so the page warns you before you choose it.
Companies asking to move to their own server #
Where Platform » Moves to own servers
- Open Platform, then Moves to own servers.
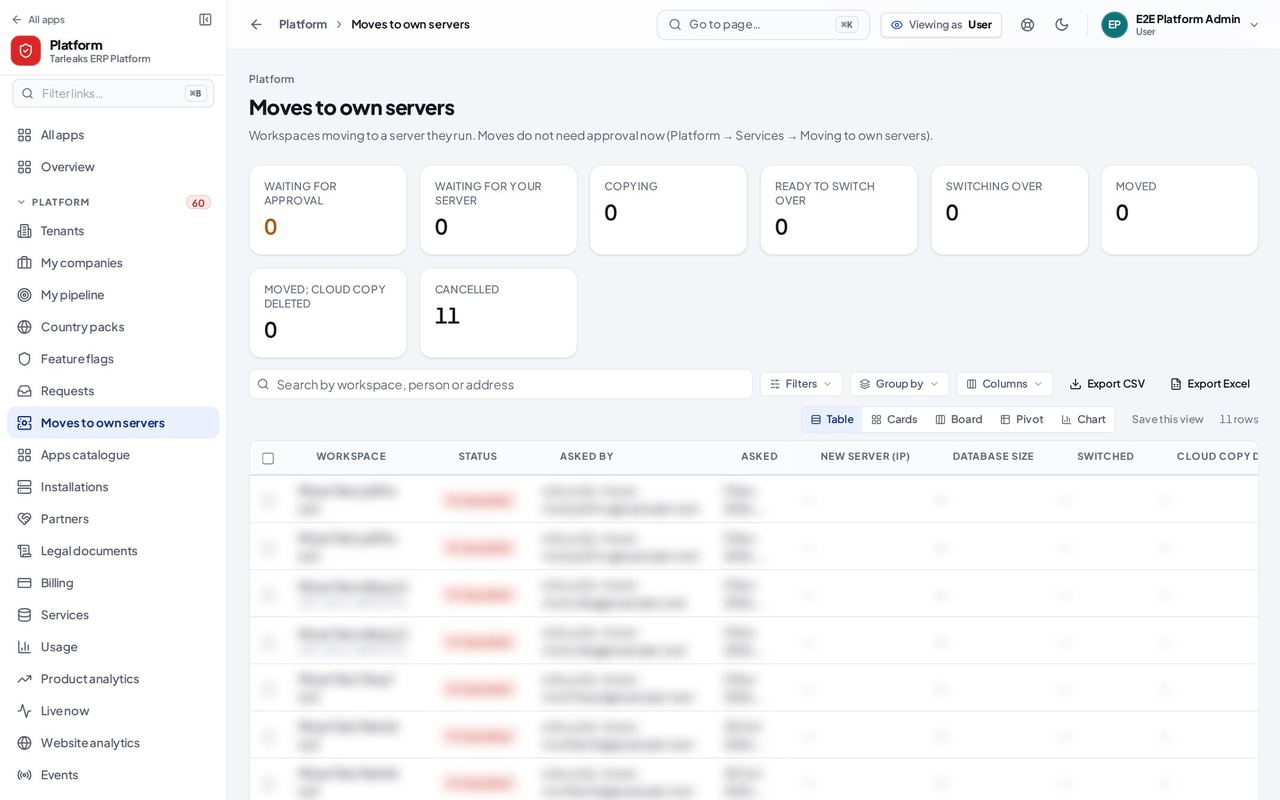
You should see One row per company that asked to leave Tarleaks Cloud: its status, who asked, the new server's address, the database size and when the cloud copy is destroyed. The counts above the table show how many are waiting, copying or moved. Approve and Refuse appear on a waiting row only when approval is switched on (Services, Moving to own servers).
Worth knowing When approval is on, approving gives the company a code that works for 24 hours: compare the key fingerprint (turn it on under Columns) with the one the company's administrator reads out first.
How the phone app is used #
Where Platform » Product analytics » Phone app
- Open Platform, then Product analytics.
- Choose Phone app.
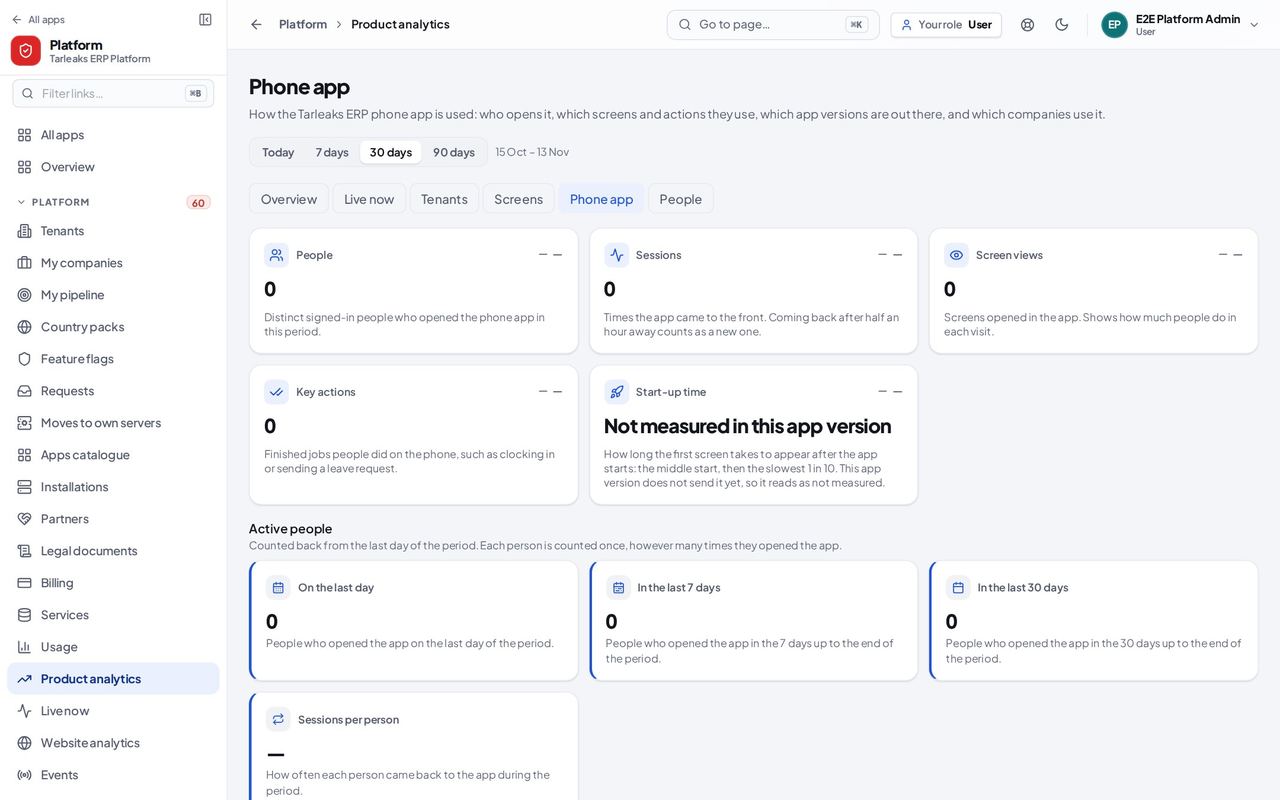
You should see People and sessions over time, then the busiest screens and actions. Only people who agreed to share usage are counted. Crash reports from the app are not on this page: open them from Platform » Monitoring & alerts » Open crash reports.
Worth knowing Counts, never names. A person who has not agreed is not in these numbers at all.
Write and schedule a website blog post #
Where Platform » Blog
- Open Platform, then Blog.
- Read the list: each post, its language and whether it is a draft, scheduled or on the website.
- Choose New post, pick English or Arabic and give it a title to start a draft.
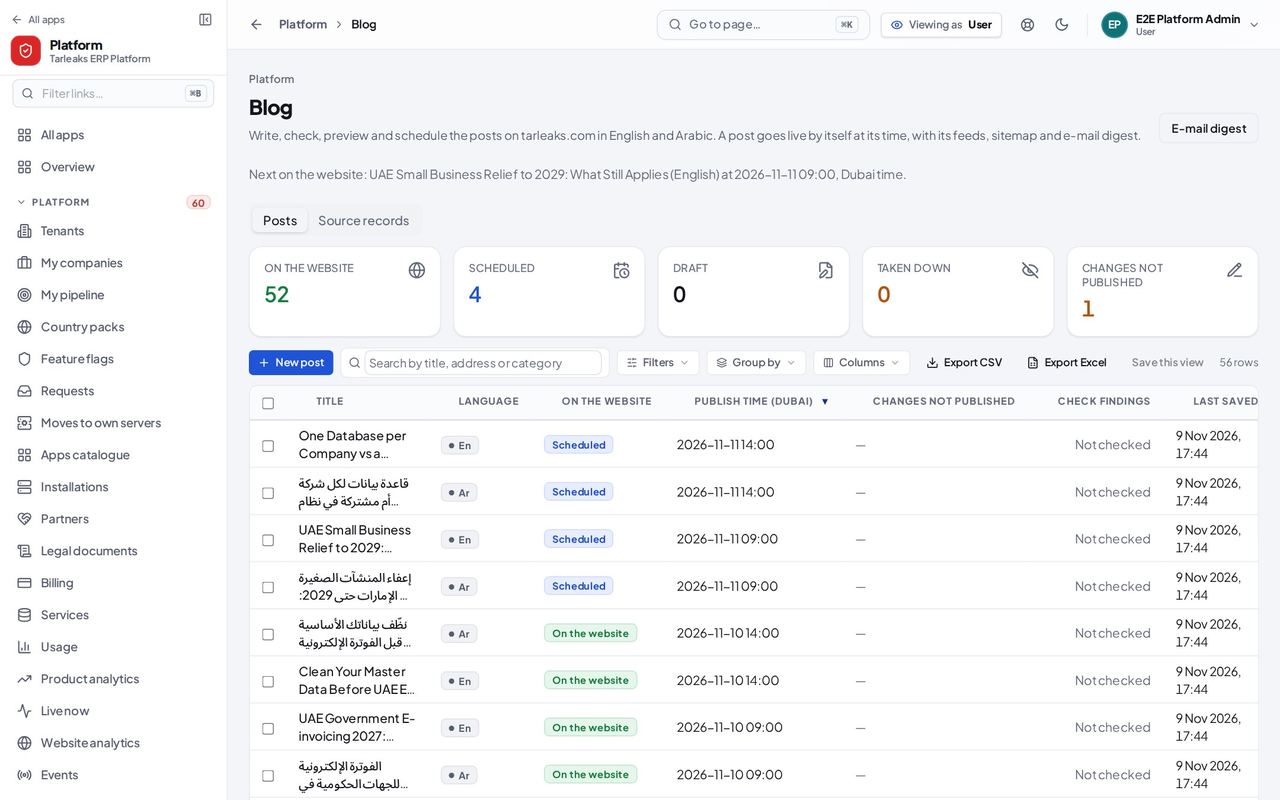
You should see The posts of tarleaks.com in one list, the next one due to go live, and a link to the e-mail digest. A scheduled post goes live by itself at its time.
Worth knowing Write the Arabic post as a translation of the English one so readers can switch between them.
Connect Stripe for card payments #
Where Platform » Services » Stripe
- Open Platform, then Services.
- Choose the Stripe tab.
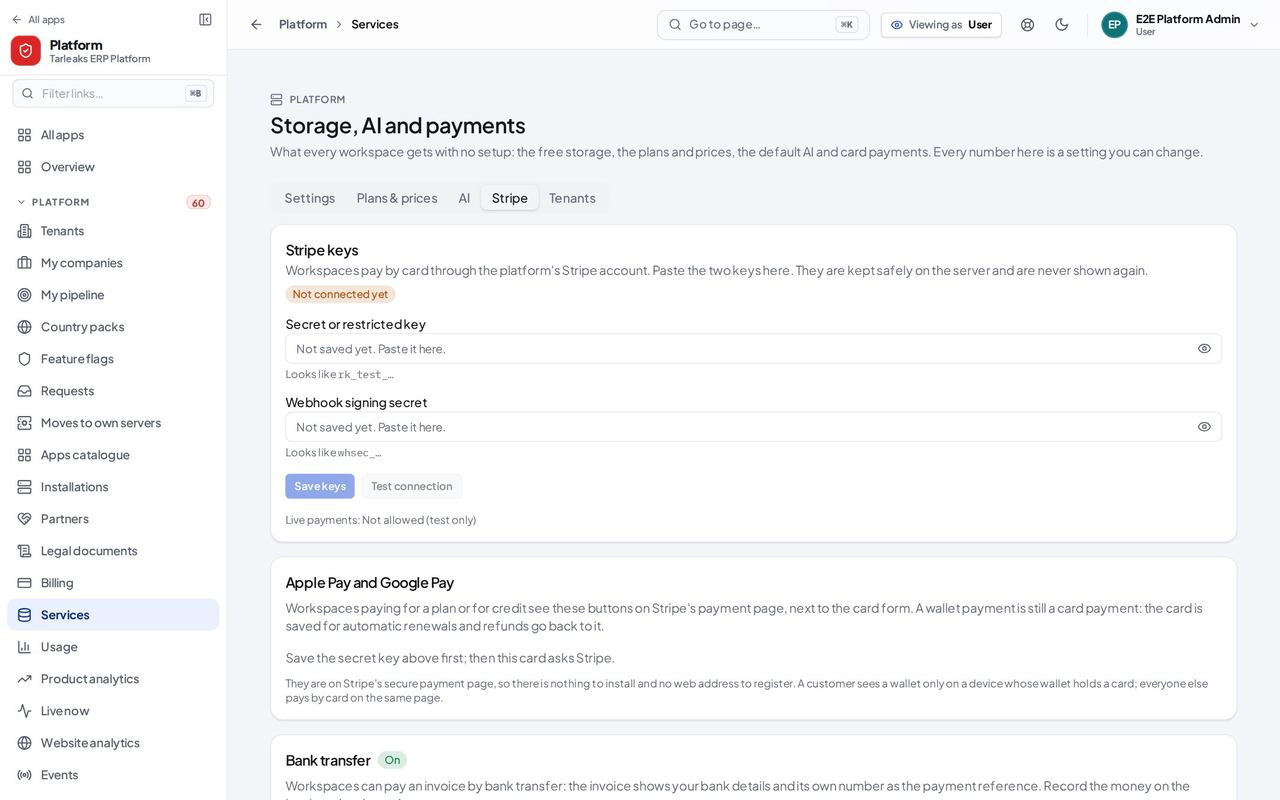
You should see Whether Stripe is connected and in test or live mode. Removing a saved key asks you to confirm first (removing the secret key also asks you to type REMOVE). While no key is saved, card payments are off and a red banner on Billing says so.
Worth knowing Keys are never shown again after saving; paste a new one to replace it.
Republish a blog post on dev.to, Hashnode or Medium #
Where Platform » Blog » a post » Export
- Open Platform, then Blog, and open a post.
- Choose Export.
- Pick the platform: Markdown, dev.to, Hashnode, Medium or Web page (HTML).
- Copy the text or download the file, and paste it into a new draft on that platform.
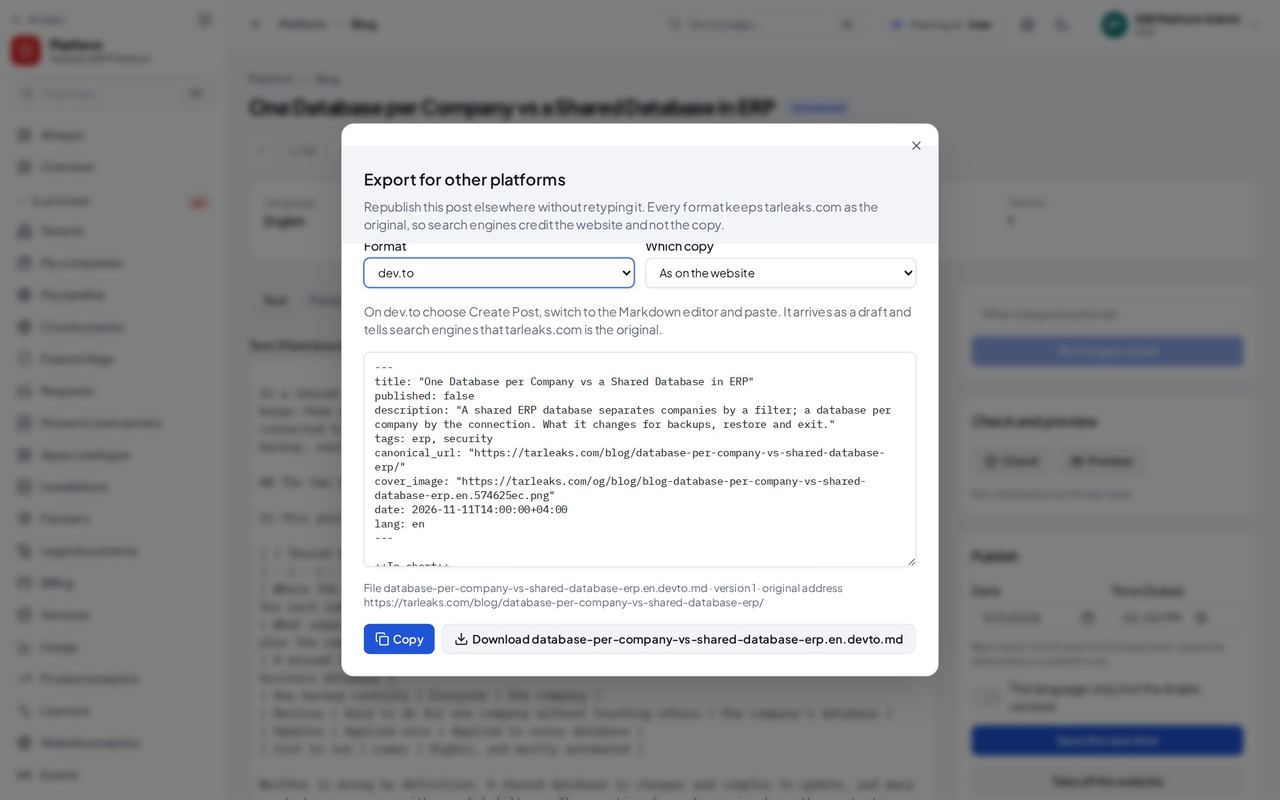
You should see A window titled Export for other platforms, a format picker with a one-line hint for each, and the ready text. It always names tarleaks.com as the original, so search engines keep crediting your site.
Worth knowing Pictures you insert in a post are stored in the blog's own public bucket and served from media.tarleaks.com, so an exported post still shows them.
See which search engines and AI assistants read the website #
Where Platform » Website analytics » Country access
- Open Platform, then Website analytics.
- Choose Country access and scroll to Search engines and AI assistants.
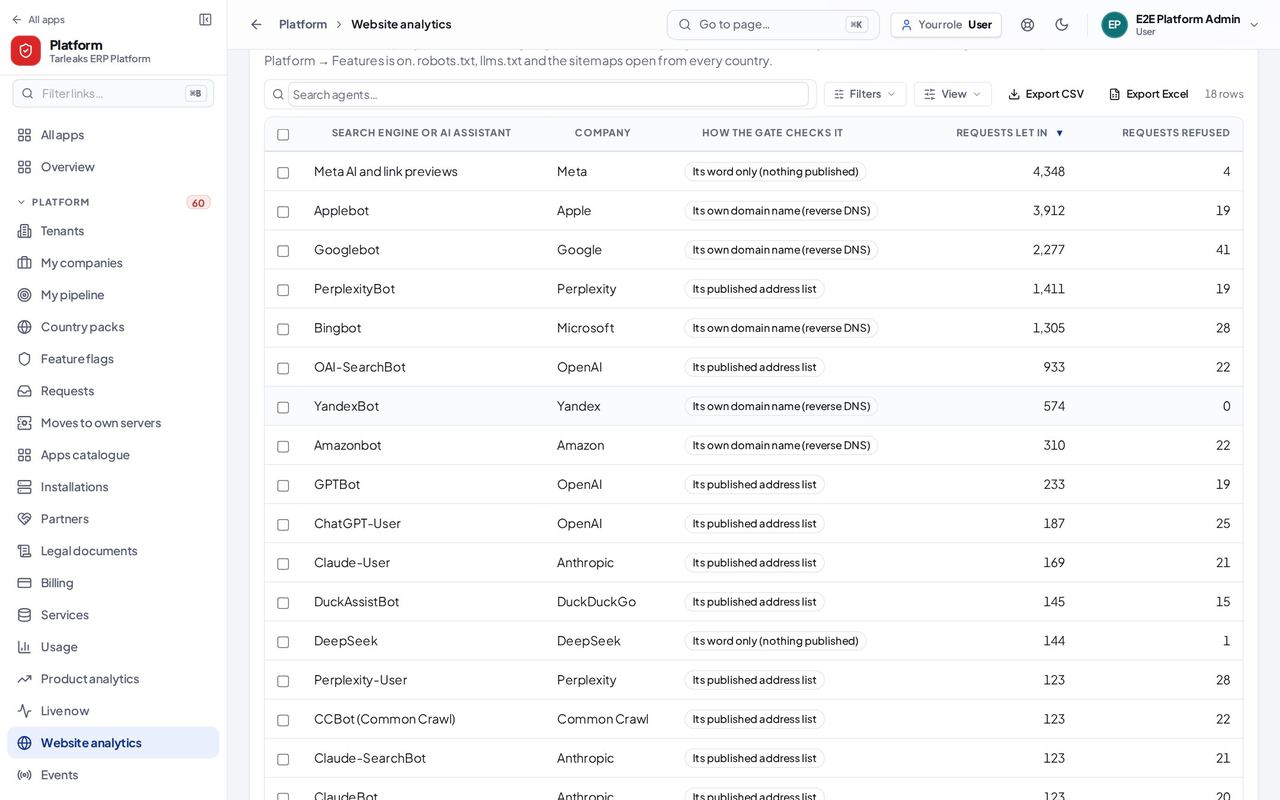
You should see A list of the search engines and AI assistants that read tarleaks.com, how each was recognised and how many times. They only read pages, and a recognised one is let in from every country.
Worth knowing From a blocked country, a name that claims to be a known search engine but fails its operator's check is refused.
Job posts and the people who applied #
Where Platform » Careers
- Open Platform, then Careers.
- Read the Job posts tab: each post, its state and the countries that may see it.
- Choose Applications to see who applied, and Settings to pick who gets the new-application e-mail.
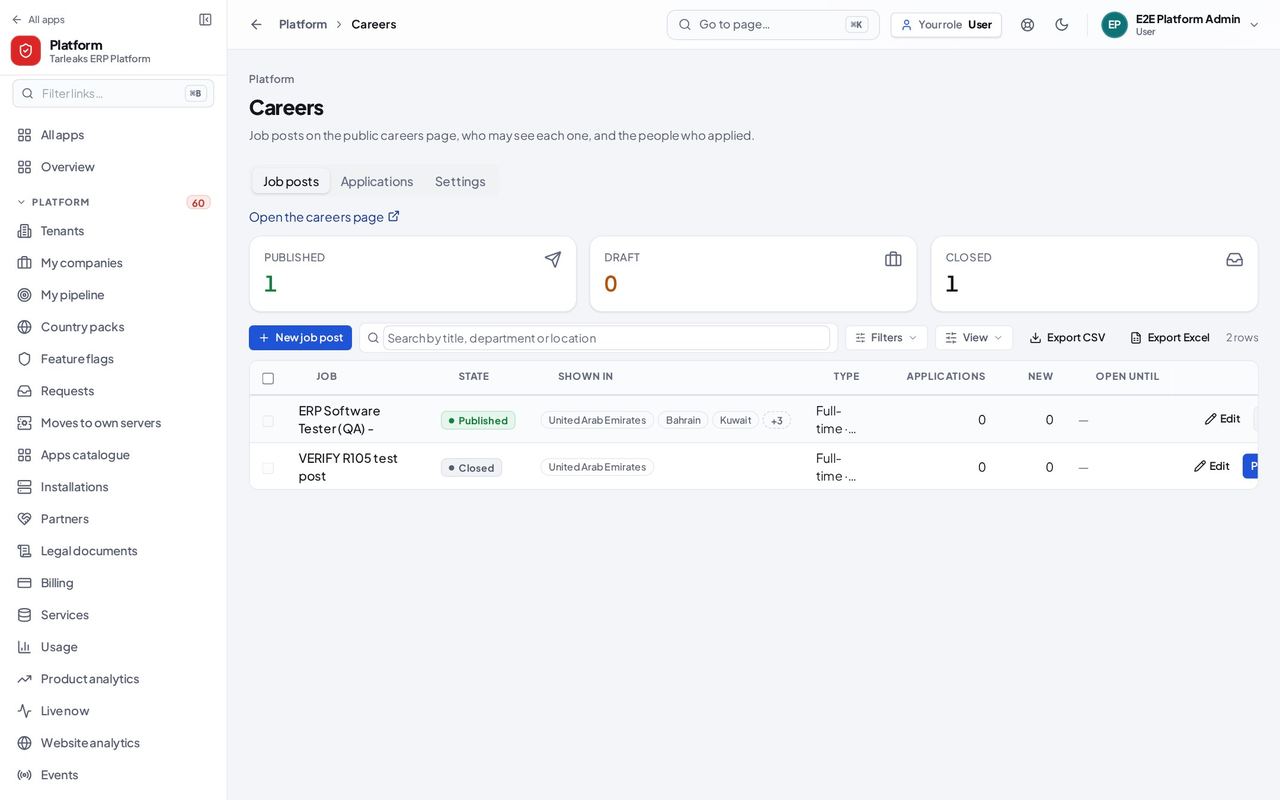
You should see The job posts of the public careers page with their state. A post is visible only once you publish it, and only in the countries you chose (no country chosen = every country).
Worth knowing Applications hold people's details: open one only to do the hiring job.
Connect Slack, Microsoft Teams and Entra ID once for every company #
Where Platform » Services » Connected apps
- Open Platform, then Services.
- Choose the Connected apps tab.
- Copy the web addresses shown into the provider's own app screen, then paste the values it gives back and save.
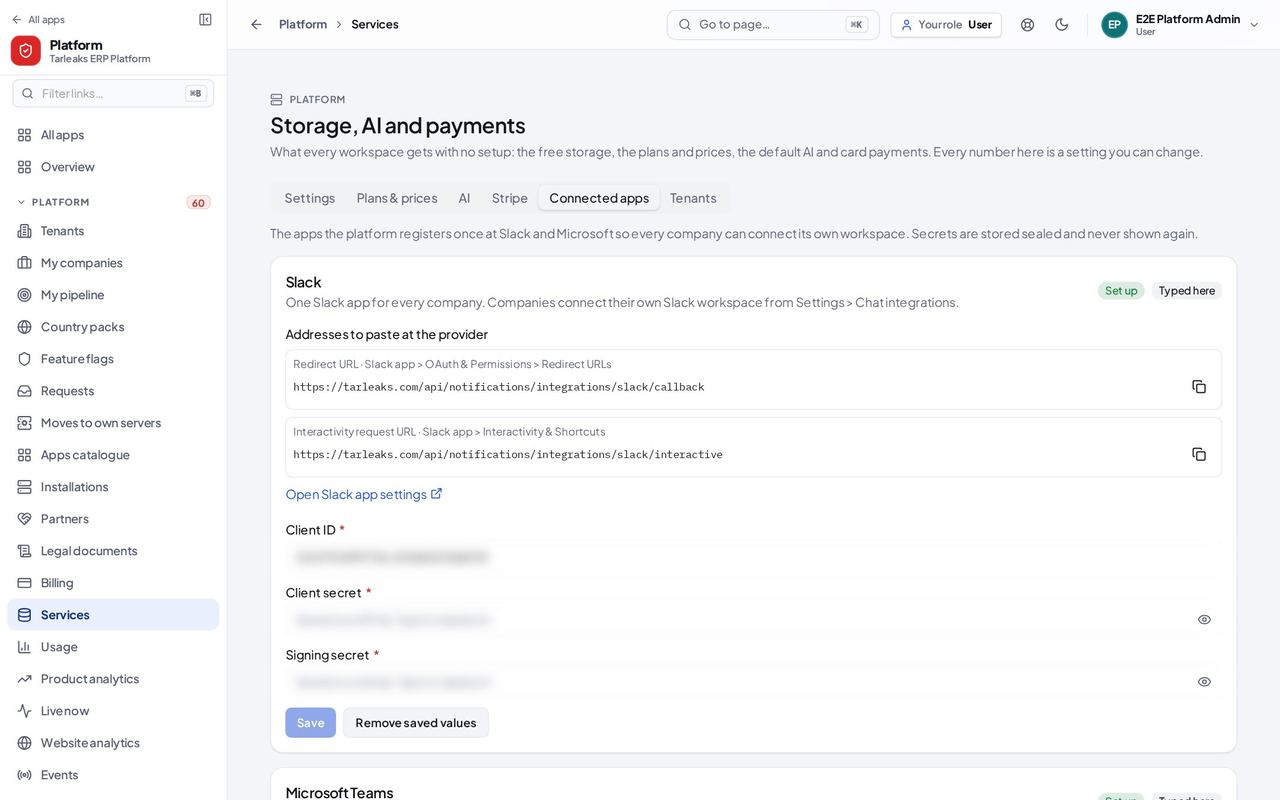
You should see One card per app showing whether its values are saved. Secrets are stored sealed and never shown again, and removing saved values asks you to confirm first.
Worth knowing Paste a new value to replace a saved one; saved secrets are never displayed.
Tell our own visits from outside visitors #
Where Platform » Website analytics » Visitors
- Open Platform, then Website analytics.
- Choose Visitors.
- Use Include our own visits to show or hide ours in the numbers.
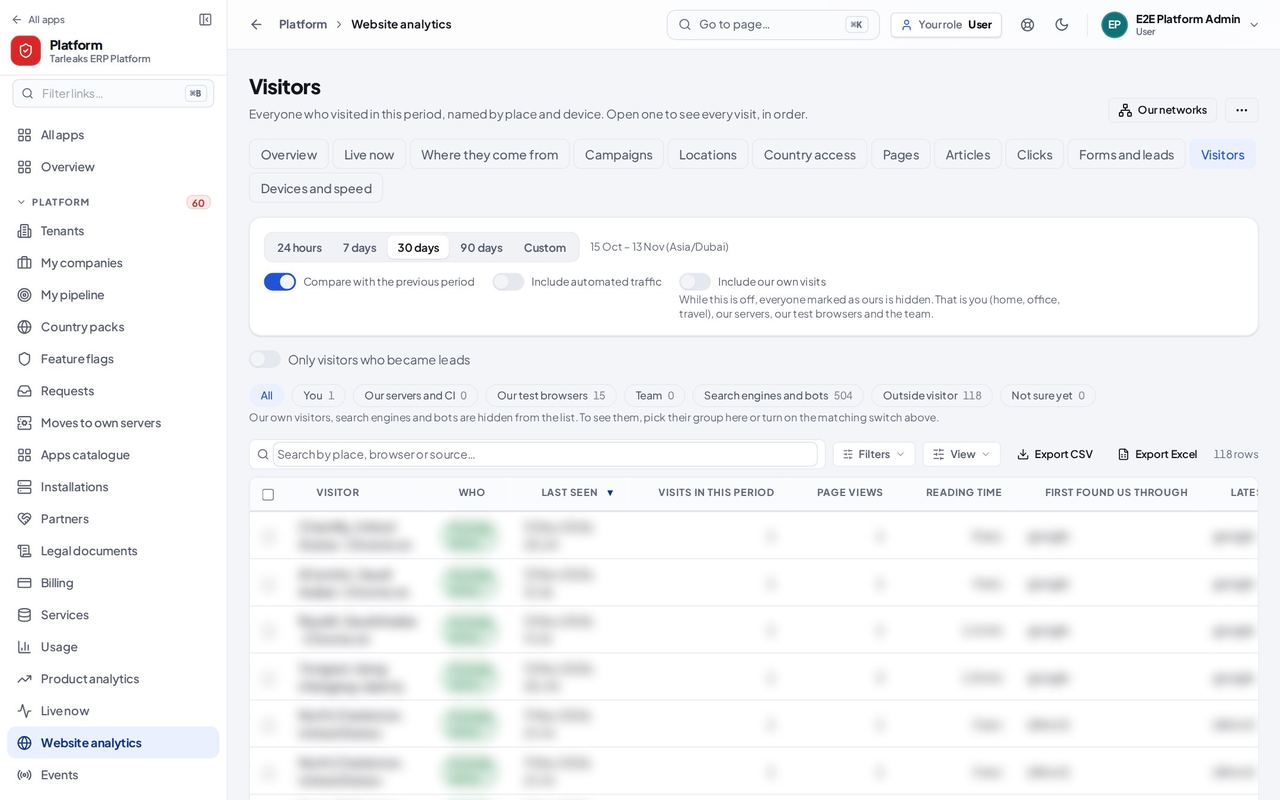
You should see Each visitor is labelled as ours, a search engine or bot, or an outside visitor, so the numbers are about real prospects. Our own visits are hidden unless you include them.
Worth knowing Visitor rows are blurred in the pictures; they are real people.
See what changed in the product #
Where Platform » Home » What's new
- Open Platform. The home page has a What's new card.
- Read the newest changes, then press See all for the full list.
- Press a change's link to open the page it lives on.
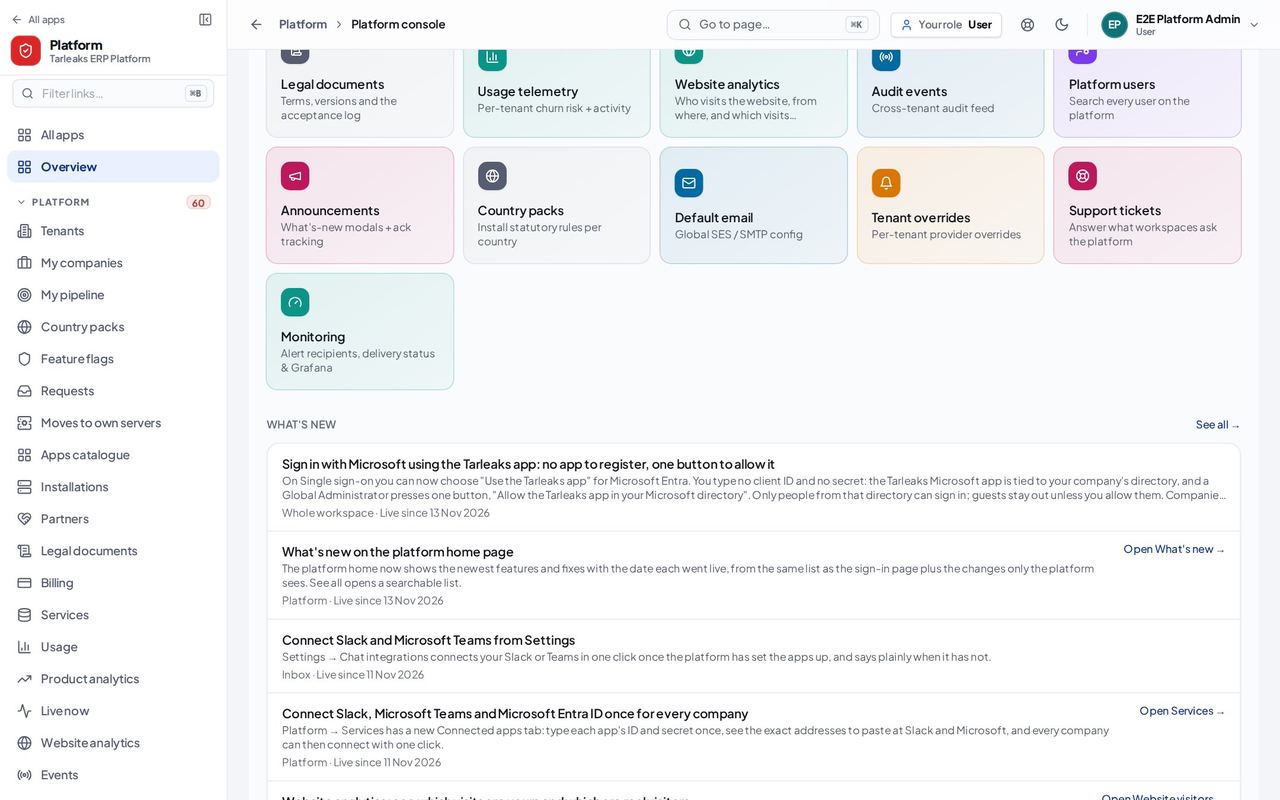
You should see The five newest features, newest first. Each has a plain sentence, the app it belongs to, Live since and the date it reached this server, and a link when it lives on a platform page.
Worth knowing The list is the same one the company sign-in page shows, plus the changes only the platform sees.
Invite staff, or another platform owner #
Where Platform » Staff » Invite staff
- Open Platform, then Staff.
- Press Invite staff.
- Type the e-mail address and pick the roles. Only an owner sees Make this person a platform owner.
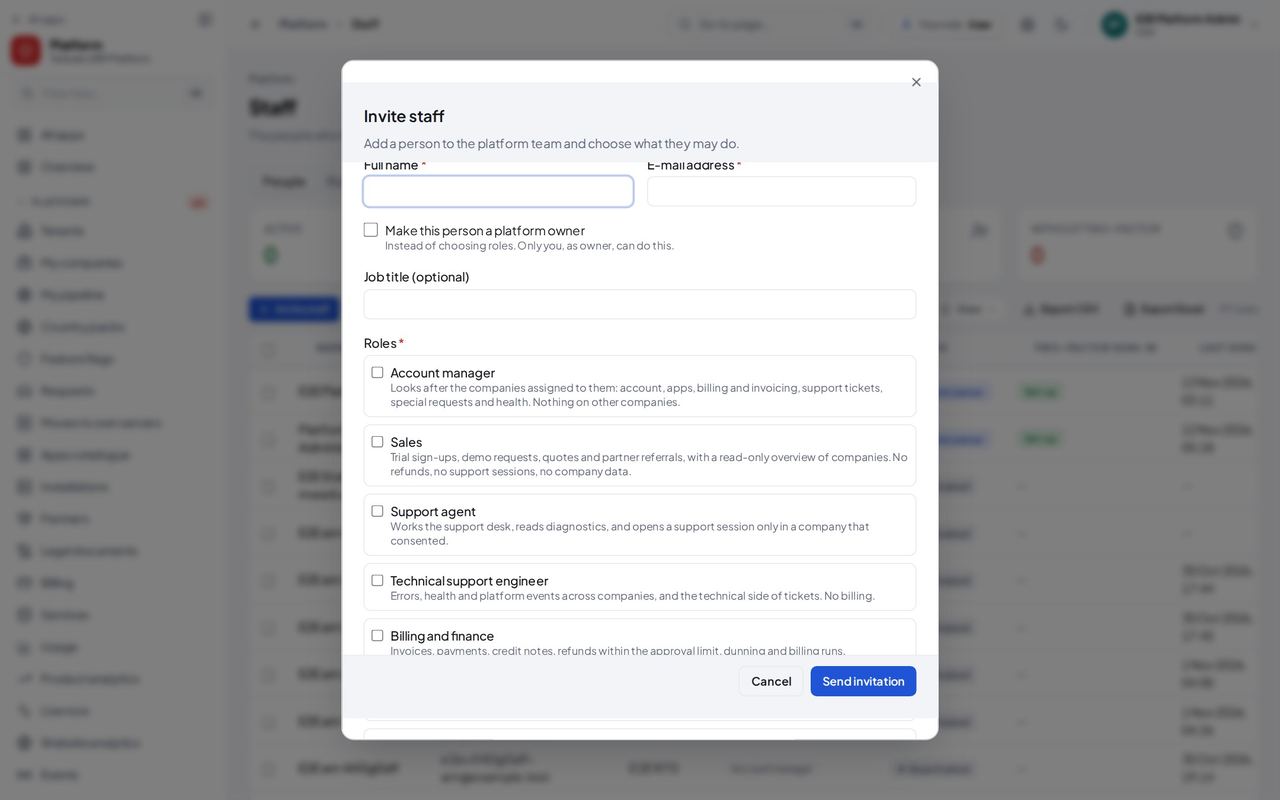
You should see The invitation form: name, e-mail, job title, roles, allowed addresses and session length. As the owner you also see the switch Make this person a platform owner.
Worth knowing An owner invitation lives 1 day and always needs two-step sign-in. Remove owner access is on the other owner's own page under Staff; you cannot remove yourself.
You are never limited: the approval limit and the second-person rule hold your staff, not you. Every decision, with its reason, stays in the request and in Staff » Activity.