Helpdesk role guides — what each role can do, step by step
Step-by-step guides for the service desk — the agent who works the queue against the SLA clock, the employee who raises and follows a request, and the administrator who sets up the desks, SLA policies and tags. 17 steps across 3 roles, every one of them carried out in the product before it was published here.
Last updated
Nothing matches that. Try a shorter word, or pick All roles to search every guide.
Go deeper
Helpdesk Agent
Answer every request on your desks before its clock runs out.
Works the queue of the desks they are rostered on: reads what is due, replies to the requester, keeps internal notes, moves a ticket through its states, uses canned replies and the knowledge base. Does not create desks or SLA policies.
What you will be able to do
- Read the queue with the SLA clock on every ticket
- Reply to the requester or keep an internal note
- Answer repeated questions with a canned reply
- Find the answer in the knowledge base
- Read your desks' numbers in Reports
What this role can and cannot do
| Can | Cannot |
|---|---|
|
|
7 steps, each one carried out in the product on .
Read your queue #
Where Helpdesk » Tickets
- Click the Helpdesk tile in the launcher, then Tickets.
- Read the tiles on top: your tickets, how many have breached their SLA, and the count in each state.
- Read the SLA column: it shows the clock, or Breached in red.
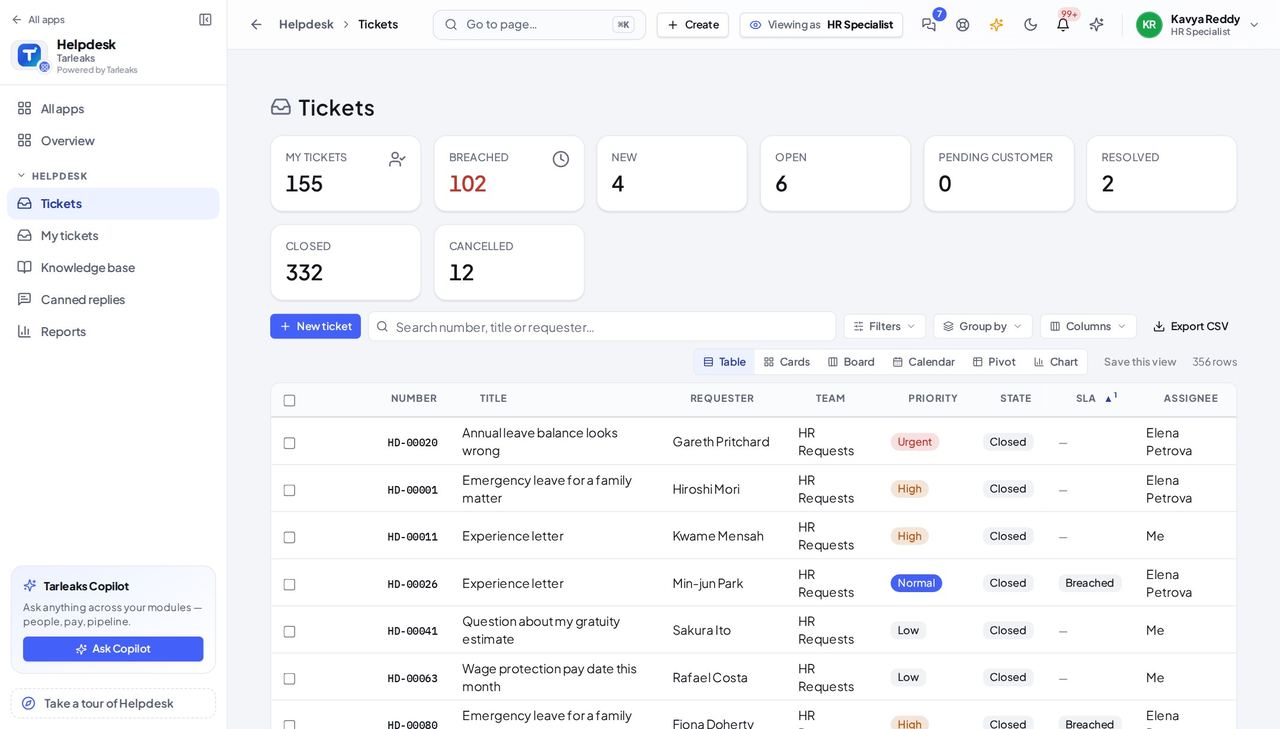
You should see Every row has a number, the requester by name, the desk, the priority and the state; the tiles add up to the number of rows.
Worth knowing Use Filters and Group by above the table to narrow the queue to your own work.
Open a ticket and read the thread #
Where Helpdesk » Tickets » a ticket
- Open your company's address in the browser — it looks like yourcompany.tarleaks.com.
- Type the e-mail address your administrator set up for you, then your password.
- You land on the app launcher: a grid of the apps your company uses.
- Click the Helpdesk tile.
- Tickets → click the ticket.
- Type your answer → Send reply.
| Field | What to put in it |
|---|---|
| Reply | what the requester should read |
| Internal note | only your colleagues see it |
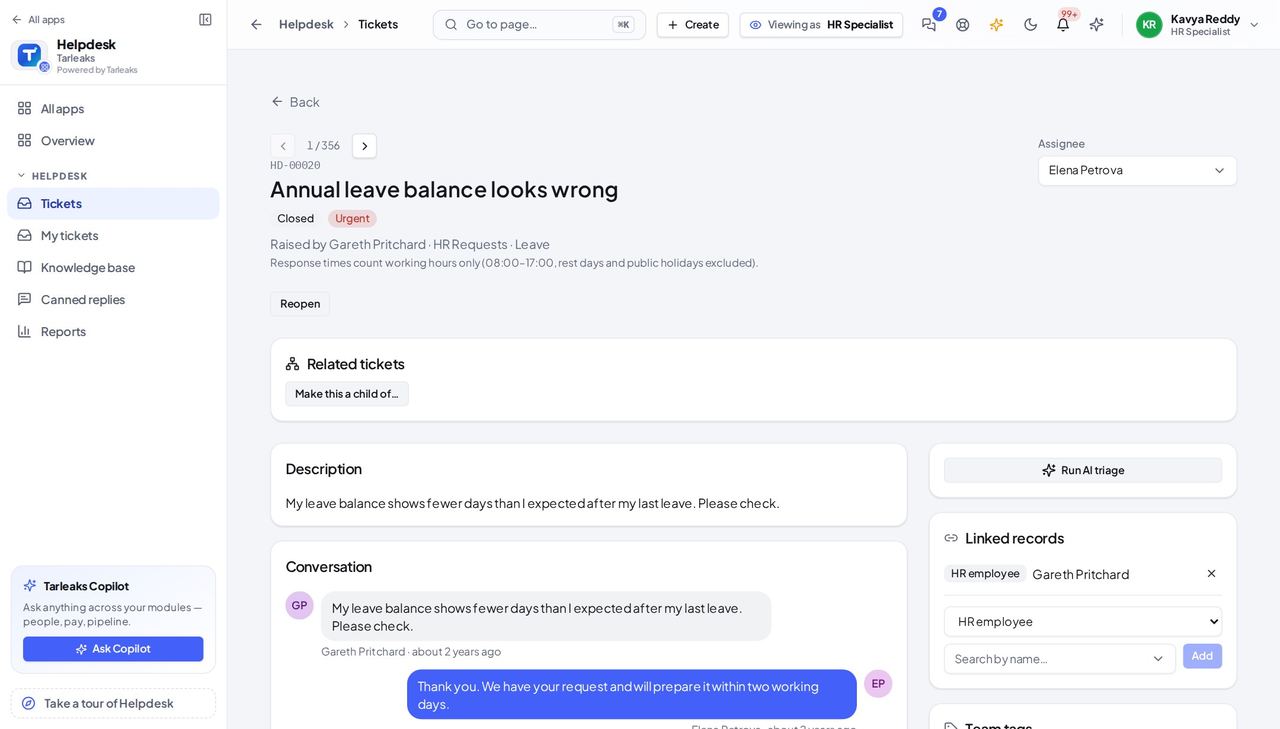
You should see The ticket's own page: state, priority, assignee, related tickets, the description and the conversation.
Watch out A public reply tells the requester; an internal note never does.
Answer with a canned reply #
Where Helpdesk » Canned replies
- Open Canned replies to read the replies your desks share, and your own.
- In a ticket's reply box, type / and pick one: its text is put in the box for you to adjust before sending.
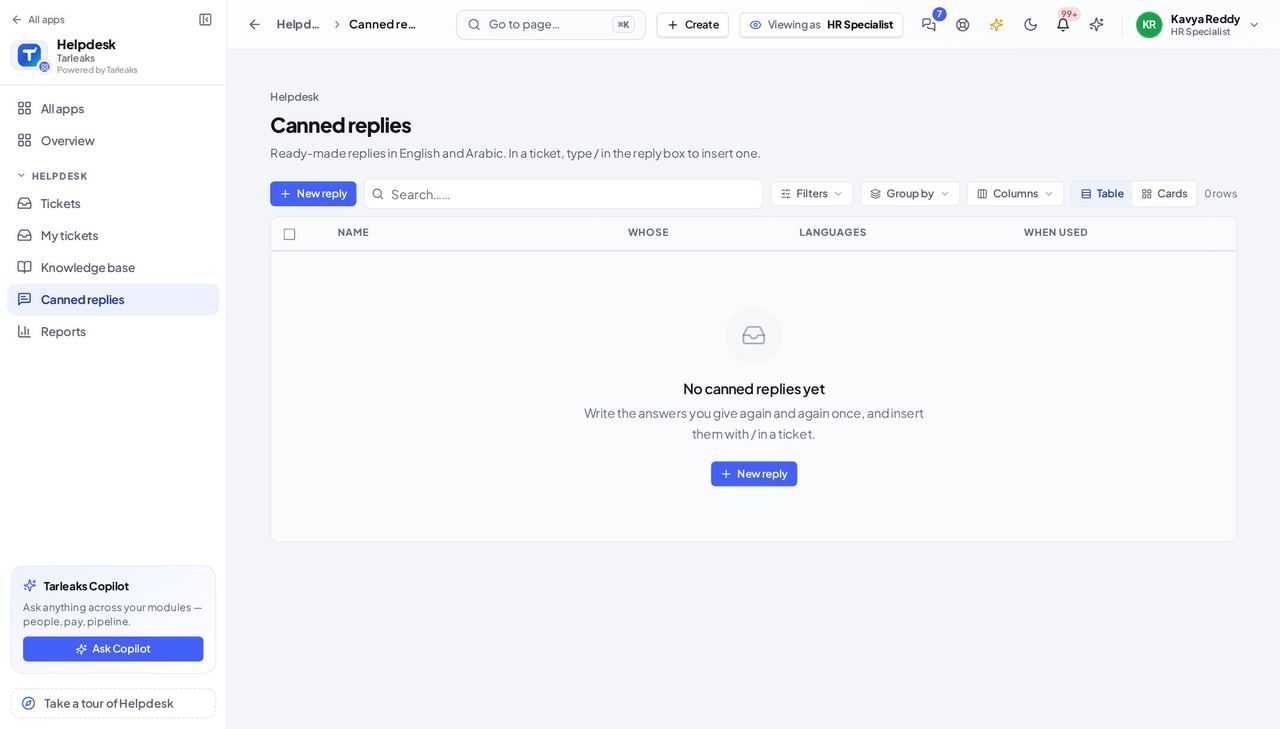
You should see A list of named replies you can insert into any ticket.
Search the knowledge base #
Where Helpdesk » Knowledge base
- Open Knowledge base and type a word in the search box.
- Click an article to read it; an agent who may edit articles gets the editor.
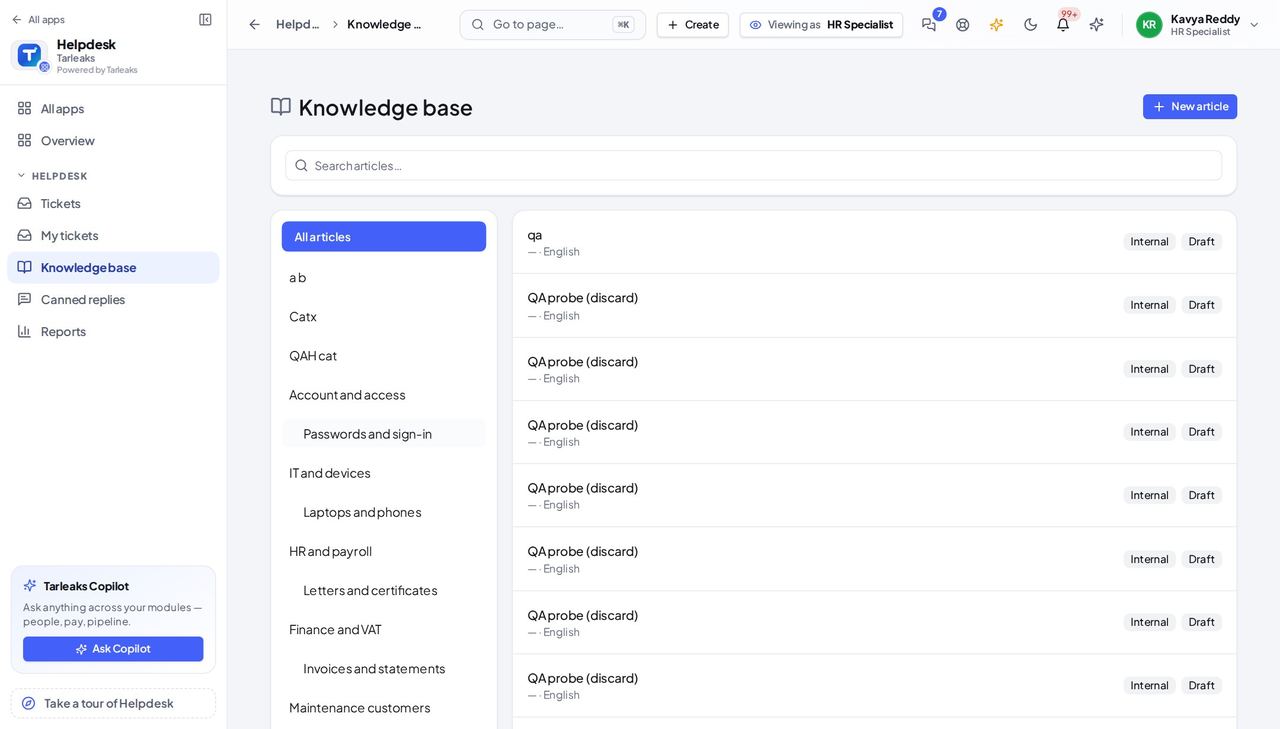
You should see Published articles that match the word, by title.
Read your desks' numbers #
Where Helpdesk » Reports
- Open Reports.
- Choose the period at the top; the satisfaction trend and the breakdown follow it.
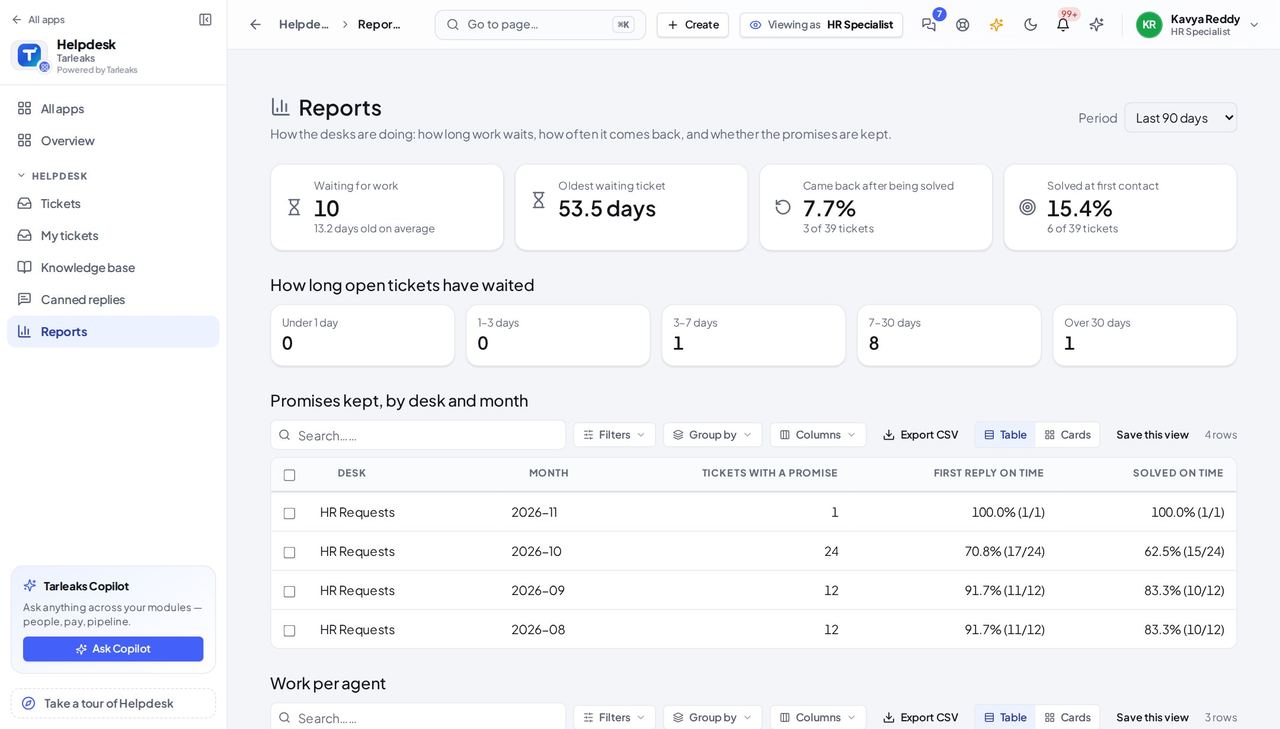
You should see Numbers for the desks you sit on, for the period you chose.
Raise a ticket for someone #
Where Helpdesk » Tickets » New ticket
- Press New ticket.
- Choose the Team (the desk), then write the Title and the Description and set the Priority.
- Leave Requester as it is to raise it for yourself, or pick another person.
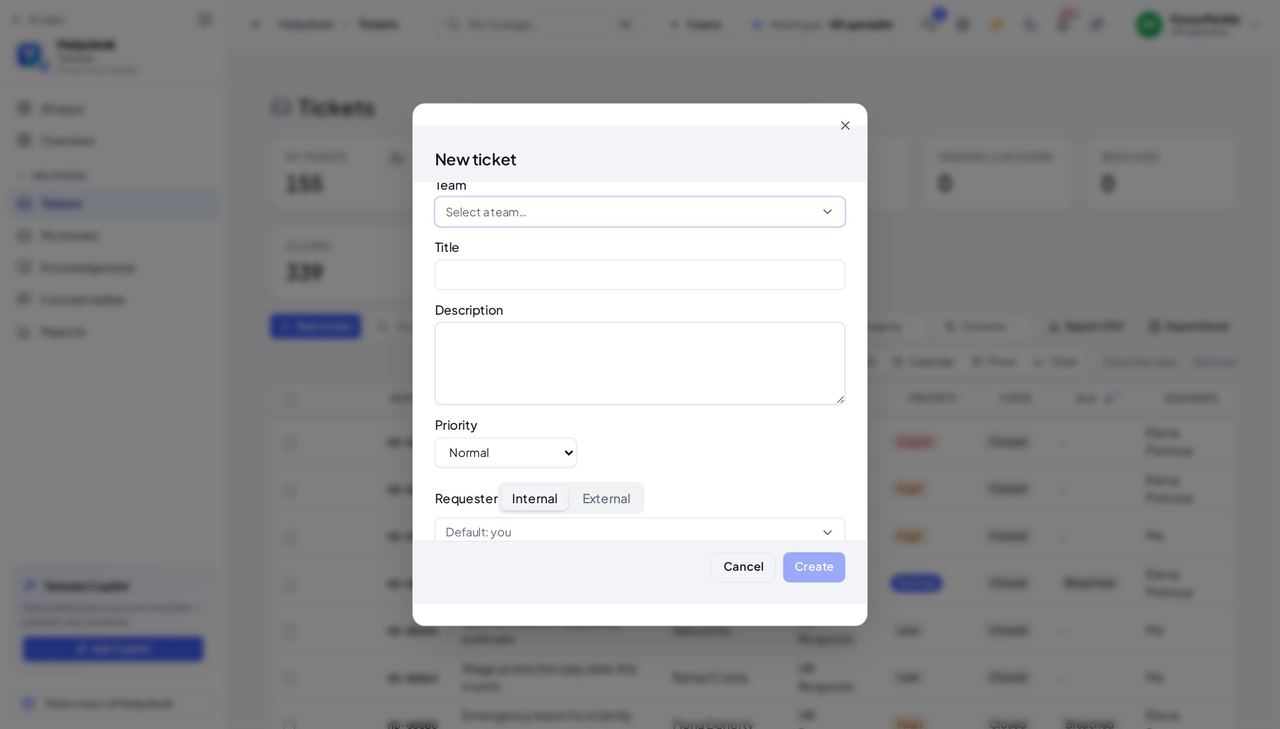
You should see A form with Team, Title, Description, Priority and Requester.
Worth knowing If your workspace has only one desk (a new workspace starts with the Support desk), Team is already chosen for you.
See what is not yours #
Where Helpdesk (the menu)
- Look at the Helpdesk menu: Tickets, My tickets, Knowledge base, Canned replies and Reports are there.
- Desks & SLAs is not — creating a desk or an SLA policy belongs to the administrator.
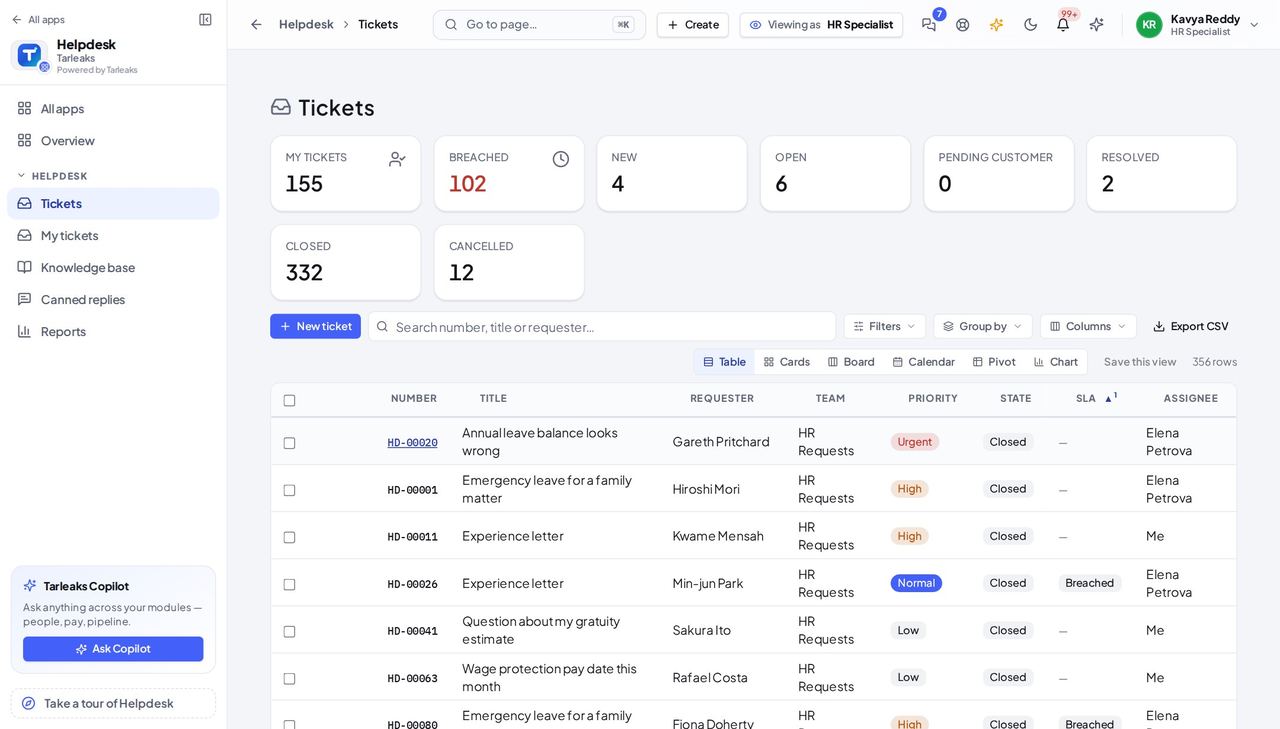
You should see No Desks & SLAs entry in the menu.
Use cases — the work, step by step
Each one is a sequence somebody actually performs, with the screen behind every step. Every screen here was opened in the product as this role before it was published.
all dayA new request arrives #
Answer inside the clock: the first public reply starts the ticket, and the SLA tells you how long you have left.
Tickets → sort by the SLA column: the ticket closest to its deadline is at the top.
Helpdesk » Tickets — verified: the page says “Breached”; the page says “New ticket”; 25 row(s) listed Open it, read the thread, and answer — with a canned reply when the question is a common one.
Helpdesk » Tickets » a ticket — verified: the page says “Conversation”; the page says “Description”
dailyA question the knowledge base already answers #
The knowledge base holds the agreed answer; use it so every requester gets the same one.
Knowledge base → search the word the requester used.
Helpdesk » Knowledge base — verified: the page says “Knowledge base” Read the article, then answer the requester in the ticket in your own words.
Helpdesk » Tickets » a ticket — verified: the page says “Conversation”; the page says “Description”
Creating desks, SLA policies and tags is the administrator's job; those pages are not in your menu.
Employee
Ask IT, HR or facilities for help and always know where your request is.
Asks IT, HR or facilities for help and follows their own requests: raises a ticket, reads the answer, rates it. Sees only their own tickets.
What you will be able to do
- Raise a ticket to the right desk
- Follow every request you raised
- Read the answer and rate it
What this role can and cannot do
| Can | Cannot |
|---|---|
|
|
5 steps, each one carried out in the product on .
See everything you asked for #
Where Helpdesk » My tickets
- Click the Helpdesk tile: you land on My tickets.
- Read each row: the ticket number, what it is about, its status and the date of the last update.
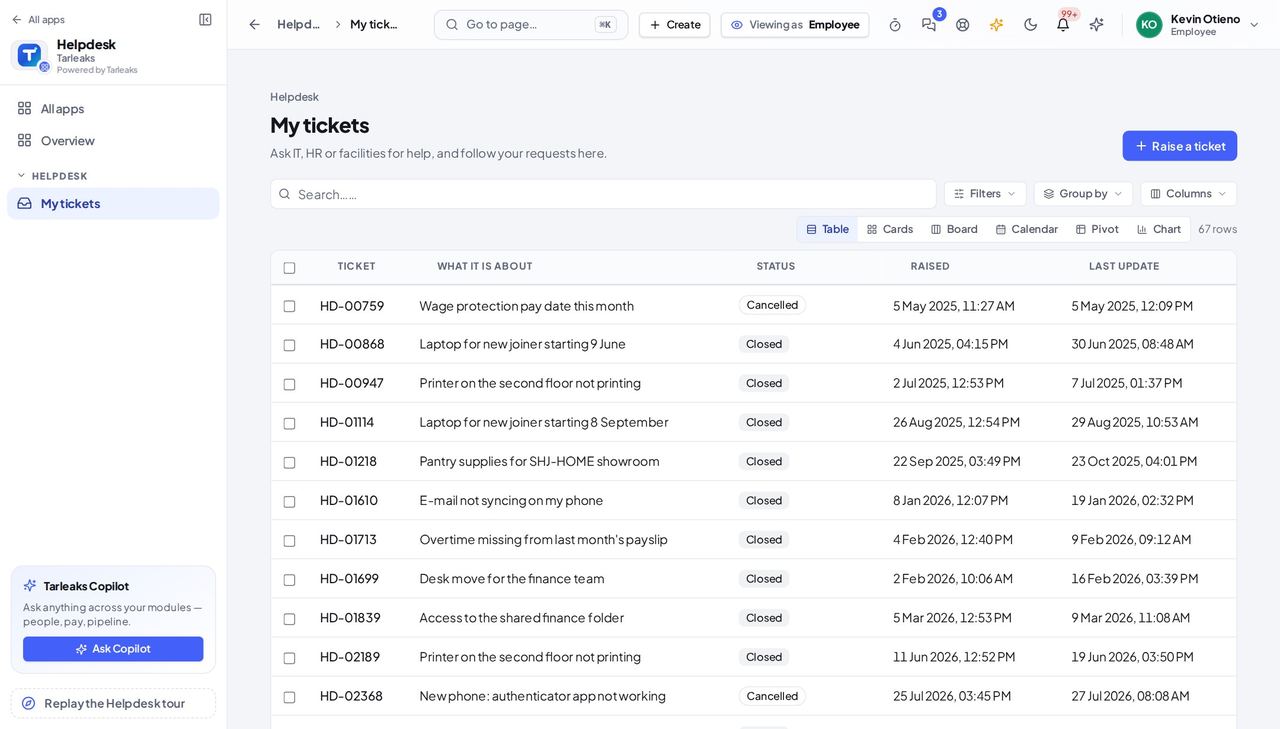
You should see Only your own tickets, newest first; a closed ticket says Closed.
Raise a ticket #
Where Helpdesk » My tickets » Raise a ticket
- Open your company's address in the browser — it looks like yourcompany.tarleaks.com.
- Type the e-mail address your administrator set up for you, then your password.
- You land on the app launcher: a grid of the apps your company uses.
- Click the Helpdesk tile.
- My tickets → Raise a ticket.
- Choose the team → write what it is about and the details → set the urgency → Send ticket.
| Field | What to put in it |
|---|---|
| Who should help? | IT, HR or facilities — the one that can help |
| What it is about | one line |
| Details | what happened, and what you need |
| How urgent is it? | Normal unless it blocks your work |
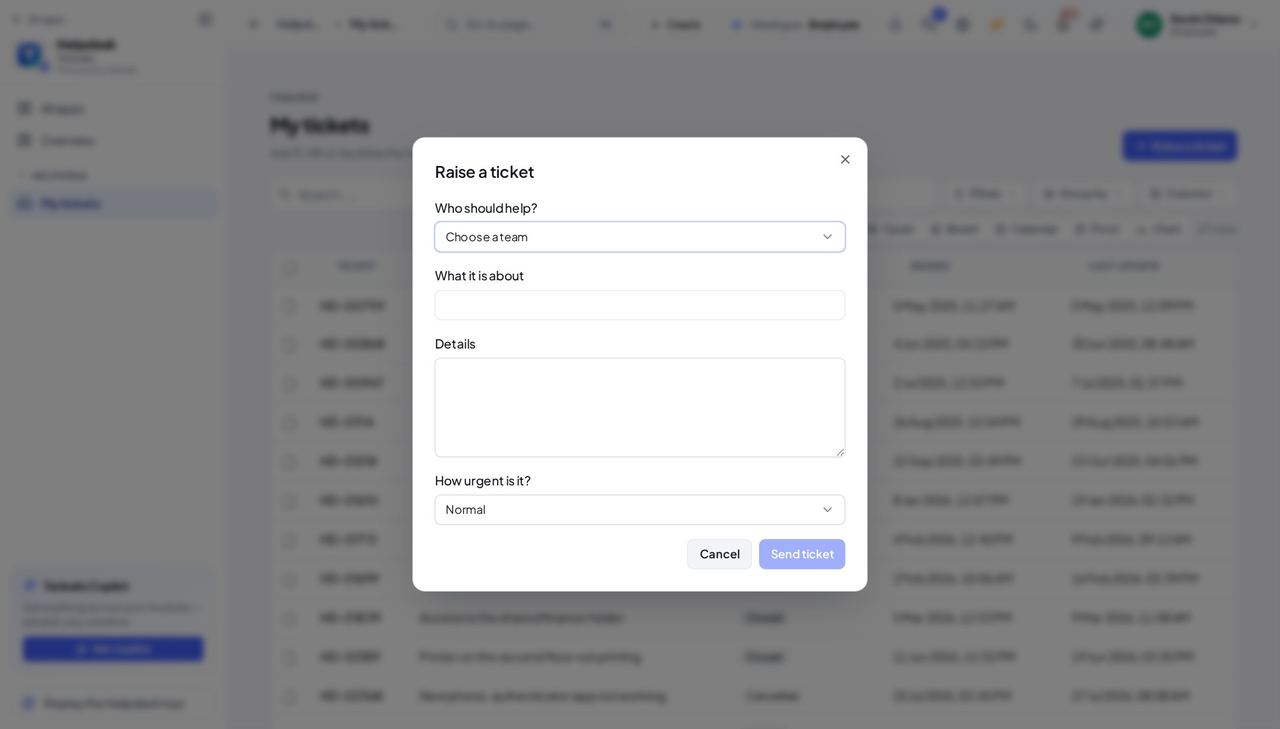
You should see A form with the team, the subject, the details and the urgency.
Watch out You will be told by notification when the desk answers.
Worth knowing If your company has only one desk, it is already chosen for you.
The desk's escalation is not shown to you #
Where Helpdesk » My tickets » a ticket
- Open a ticket that has run late.
- Read the replies: you see what the desk wrote to you, and nothing that says Escalated.
- When a ticket runs late the desk may pass it to its lead or a manager, but that happens inside the desk.
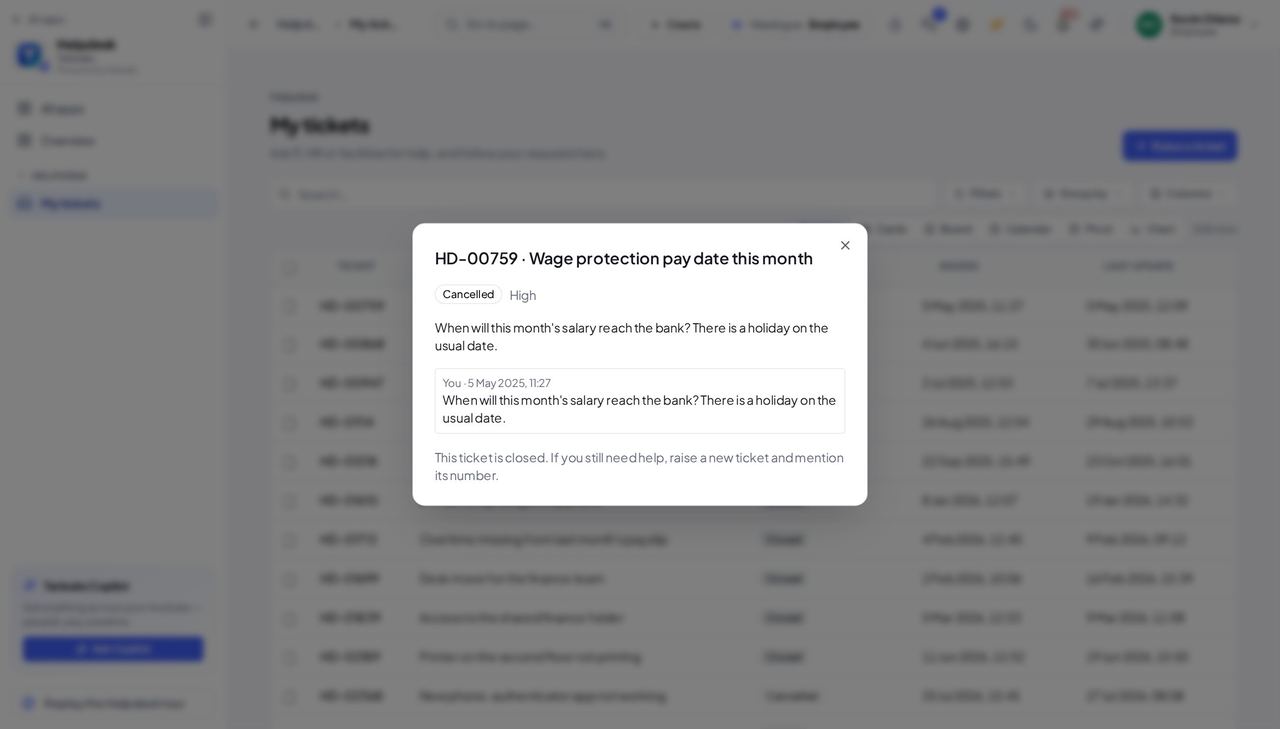
You should see Your ticket, with nothing that says Escalated.
Worth knowing You are still told when the desk answers; only the desk's own handling stays private.
Your list shows no escalation flag #
Where Helpdesk » My tickets
- Read the list: the number, the subject, the status, the date raised and the date of the last update.
- No row carries an Escalated flag, however late the ticket is.
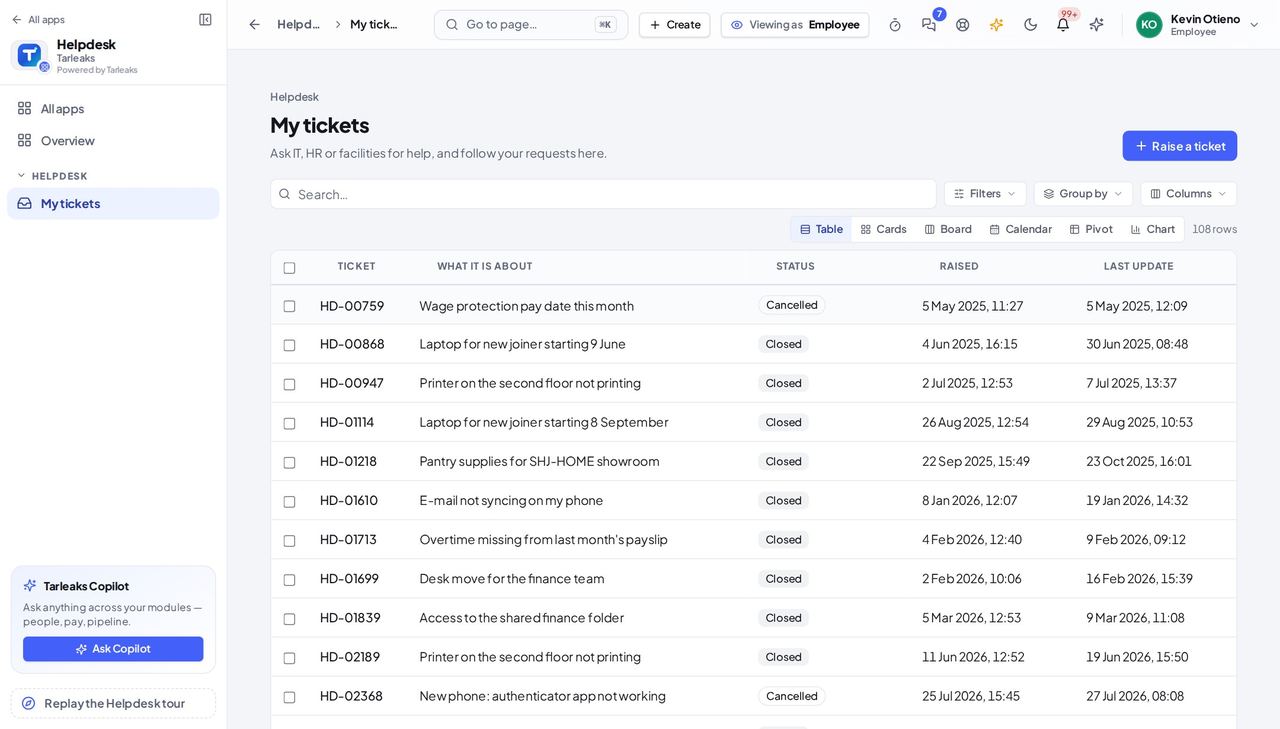
You should see The list of your own tickets, without any escalation marker.
See what is not yours #
Where Helpdesk (the menu)
- Look at the Helpdesk menu: only My tickets is there.
- The queue, canned replies and the desk settings belong to the agents and the administrator.
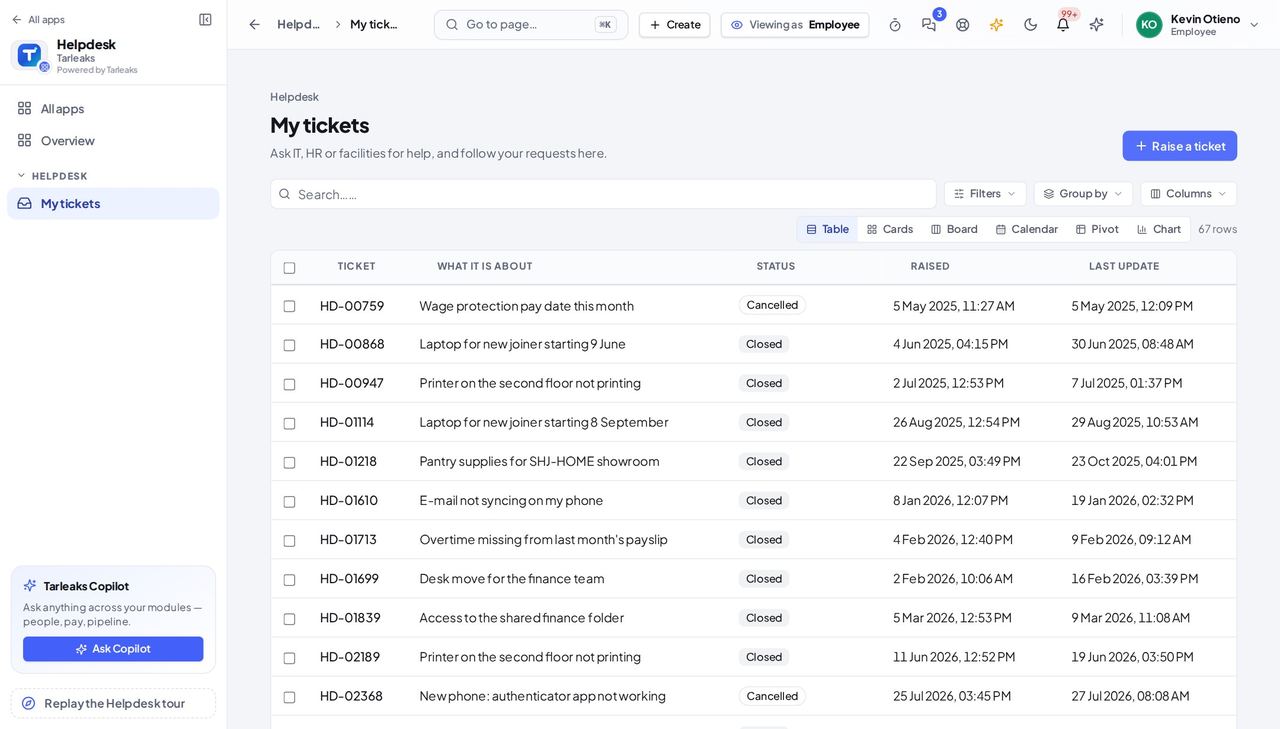
You should see A menu with one entry.
Use cases — the work, step by step
Each one is a sequence somebody actually performs, with the screen behind every step. Every screen here was opened in the product as this role before it was published.
occasionallyMy printer stopped working #
One ticket to the right desk, and you can follow it without asking anyone.
My tickets → Raise a ticket: choose IT, write one line and the details.
Helpdesk » My tickets » Raise a ticket — verified: the page says “Who should help?”; the page says “Send ticket” Come back to My tickets: the status changes as the desk works on it.
Helpdesk » My tickets — verified: the page says “My tickets”; the page says “Raise a ticket”; 25 row(s) listed
The agents' queue and the desk settings are not yours — only your own tickets are listed.
Tenant Admin
Set the desks up once, so every request lands with the right people on the right clock.
Sets the desks up: who sits on which desk, which SLA each desk promises, the tags, and the data requests from people who ask what the company holds on them.
What you will be able to do
- Create desks and choose who sits on them
- Give each desk its SLA policy
- Keep the tags tidy
What this role can and cannot do
| Can | Cannot |
|---|---|
|
|
5 steps, each one carried out in the product on .
Read your desks #
Where Helpdesk » Desks & SLAs » Desks
- Open your company's address in the browser — it looks like yourcompany.tarleaks.com.
- Type the e-mail address your administrator set up for you, then your password.
- You land on the app launcher: a grid of the apps your company uses.
- Click the Helpdesk tile.
- Desks & SLAs → Desks.
- New desk → name, kind, SLA policy → Save.
| Field | What to put in it |
|---|---|
| Name | what people see when they raise a ticket |
| SLA policy | the promise the desk makes |
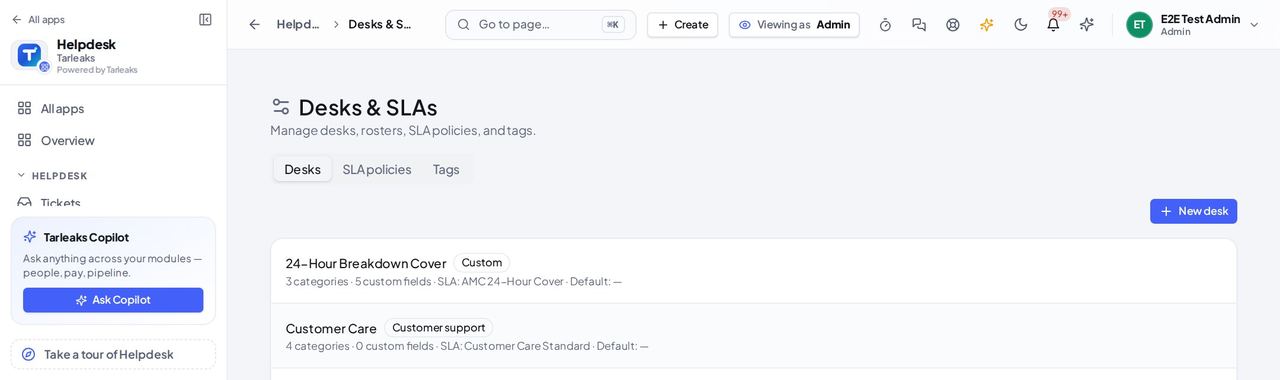
You should see One row per desk; a confidential desk carries a Confidential badge.
Watch out A confidential desk is seen only by the people rostered on it.
Read the SLA policies #
Where Helpdesk » Desks & SLAs » SLA policies
- Open the SLA policies tab.
- Each policy is a promise: how fast the first answer comes and how fast the ticket is resolved, per priority.
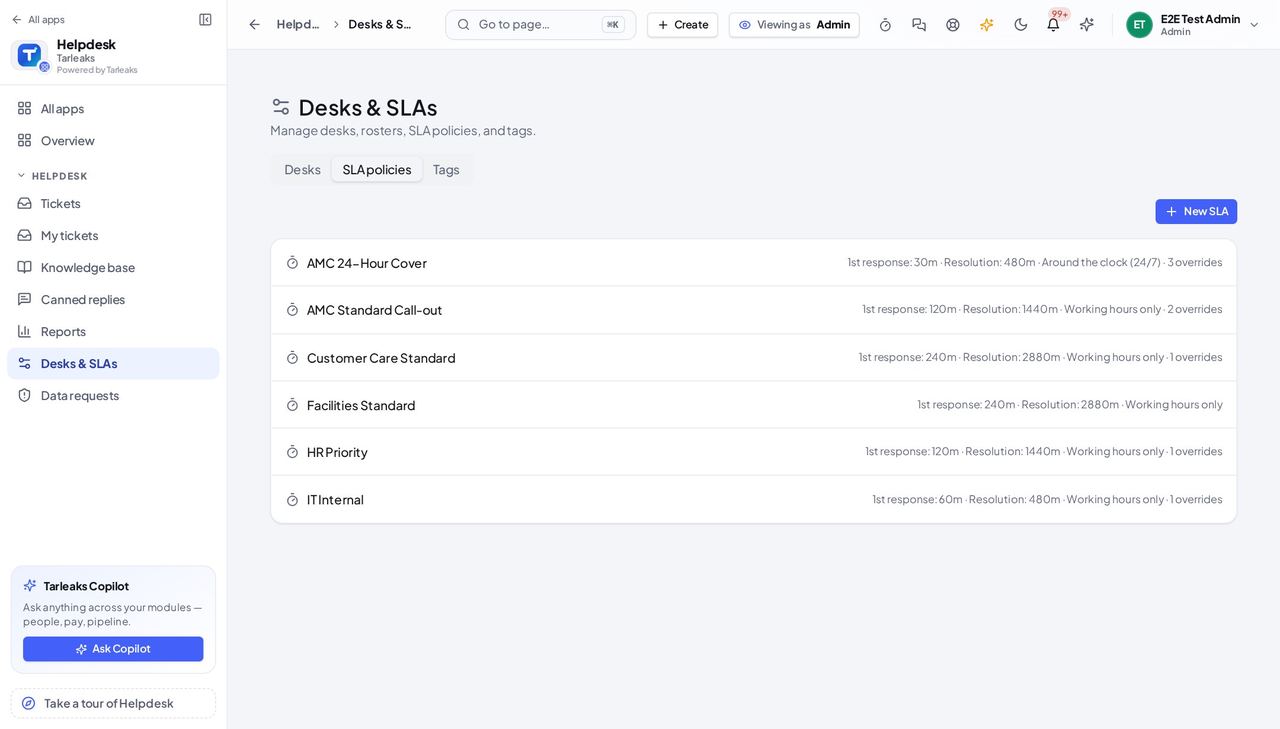
You should see The policies that desks point to.
Keep the tags tidy #
Where Helpdesk » Desks & SLAs » Tags
- Open the Tags tab.
- Add a tag or remove one that is no longer used; agents apply the tags to tickets.
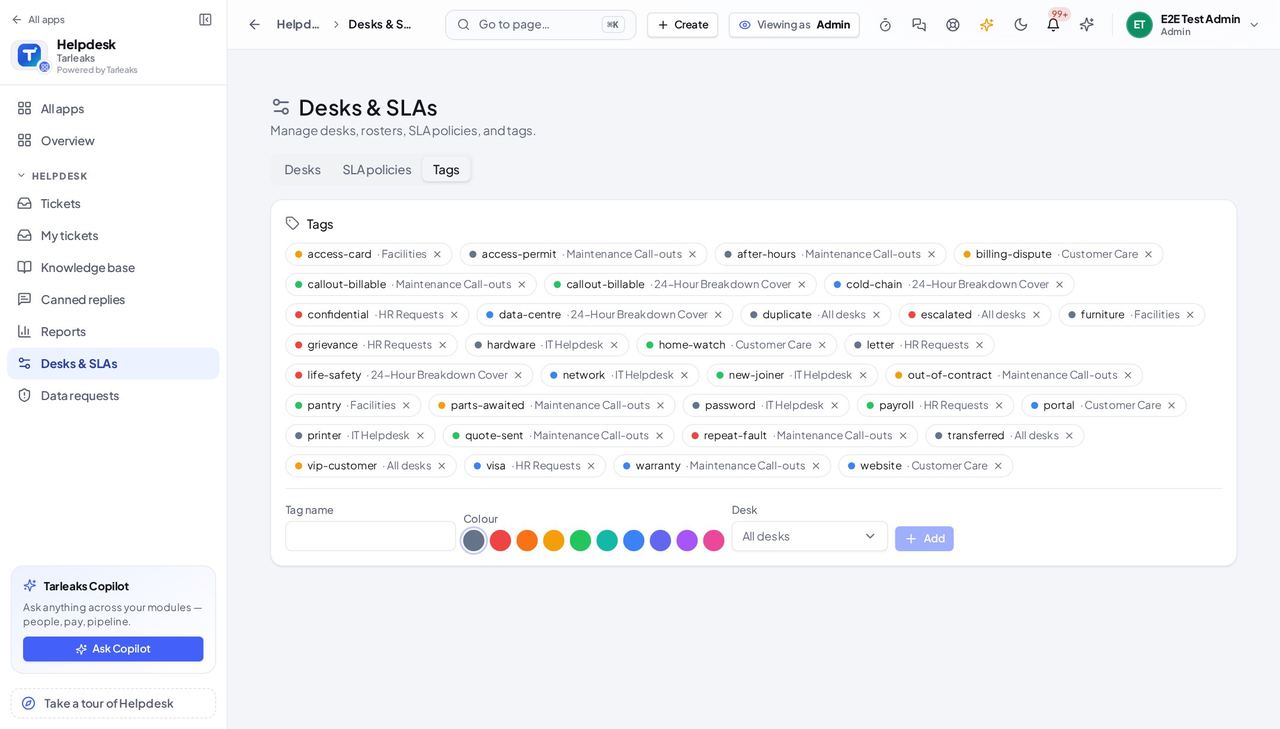
You should see The company's tags, one per row.
Let a desk read its own mailbox #
Where Helpdesk » Desks & SLAs » Desks » a desk » E-mail
- Open Desks & SLAs and click a desk: its settings open.
- Scroll to E-mail. Switch on This desk files tickets from e-mail, type the address customers write to and press Save e-mail settings (the switch and the address are saved only by that button). If the screen says e-mail intake is switched off for the company, turn it on in Settings > Features first.
- If the desk has its own mailbox, fill Mail server, Folder, Sign-in name and Password, press Check the sign-in, then Save mailbox.
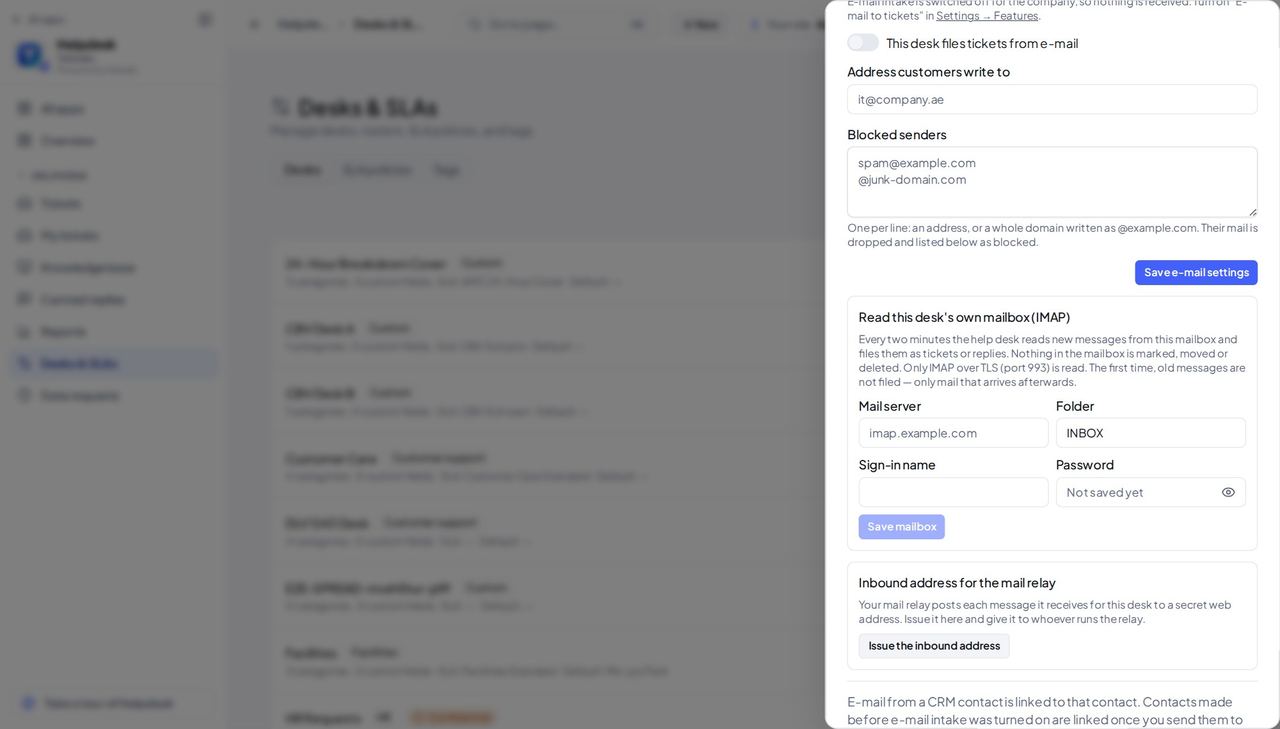
You should see The E-mail section of the desk, with the switch and the address; after saving the mailbox, Not read yet until its next check, then the time it was last read.
Worth knowing The saved password is never shown again; when it is longer than 8 characters a line names only its last four. Leave the box empty to keep it, or type a new one to replace it. There is no Remove: the mailbox cannot be read without the password. Check the sign-in always uses the saved password and says so.
Decide how long finished tickets are kept #
Where Helpdesk » Desks & SLAs » Desks
- On the Desks tab, scroll to How long finished tickets are kept.
- Type the number of months for a desk and press Save; a desk left empty keeps its tickets.
- On a ticket, Place a legal hold stops its removal until you release the hold.
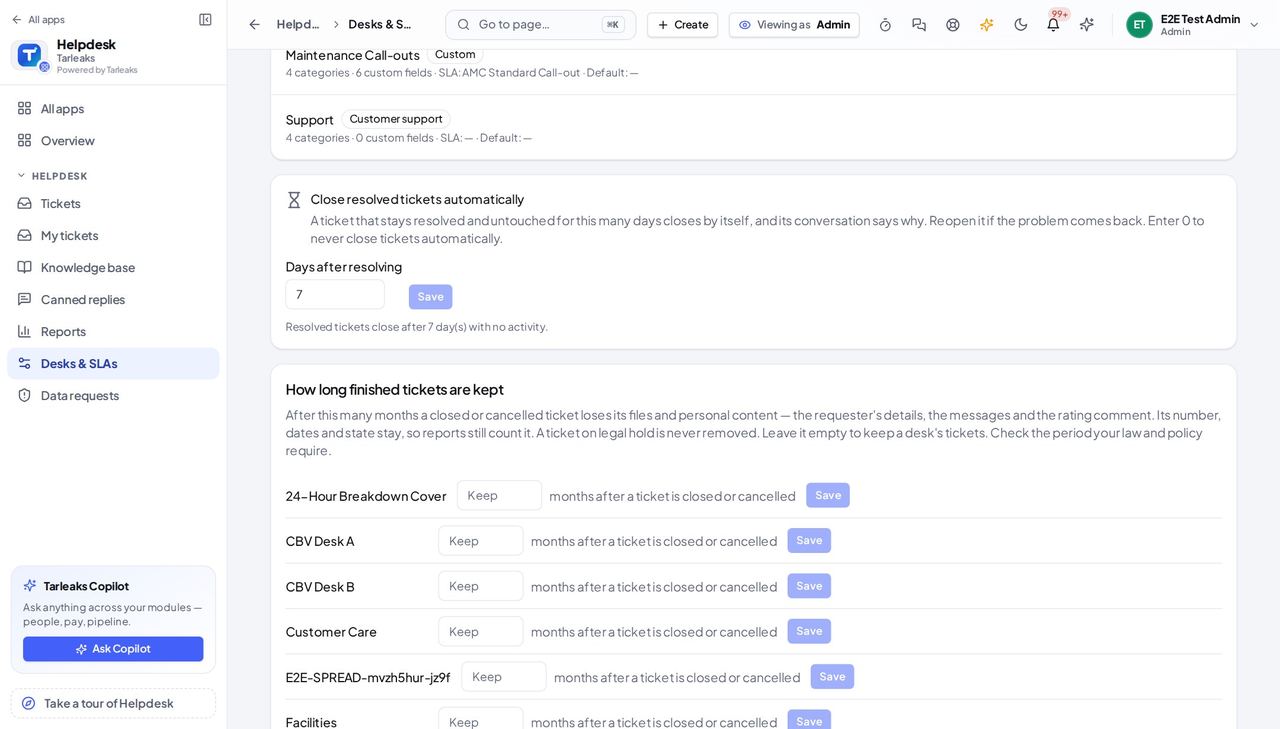
You should see One row per desk with its months and a Save button.
Use cases — the work, step by step
Each one is a sequence somebody actually performs, with the screen behind every step. Every screen here was opened in the product as this role before it was published.
when the company adds a serviceA new desk opens #
People can raise tickets to it only once it has a name, an SLA and a roster.
Desks & SLAs → SLA policies: check the promise the desk will make exists.
Helpdesk » Desks & SLAs » SLA policies — verified: the page says “New SLA”; the page says “Resolution”; no “New desk” anywhere on the page Desks → New desk: name, kind, SLA policy, and who sits on it.
Helpdesk » Desks & SLAs » Desks — verified: the page says “New desk”; the page says “Confidential”
Working the tickets is the agents' job; you set the stage.